Image compositing with diffusers


I got asked how to do something complex with diffusers. This is to have an image of a background and of a subject, in this case a car, and to composite them together and make it believable.
I'll write my whole thought process in this guide, but if you just want the code, you will find it at the end.
Image compositing
Image compositing is something that most designers have to do at one point in their careers. They learn how to do it and how to add the subtle details they need to include for making this work.
What's unusual about this is that I need to preserve both images as is and try not to change them. This is something that won't work unless there's some special coincidence between both, or the images were taken on purpose for this:
- Angle of the photo
- Lighting
- Perspective
Unless these three items are exactly the same in both images, compositing them will require you to change one of the images or sometimes both.
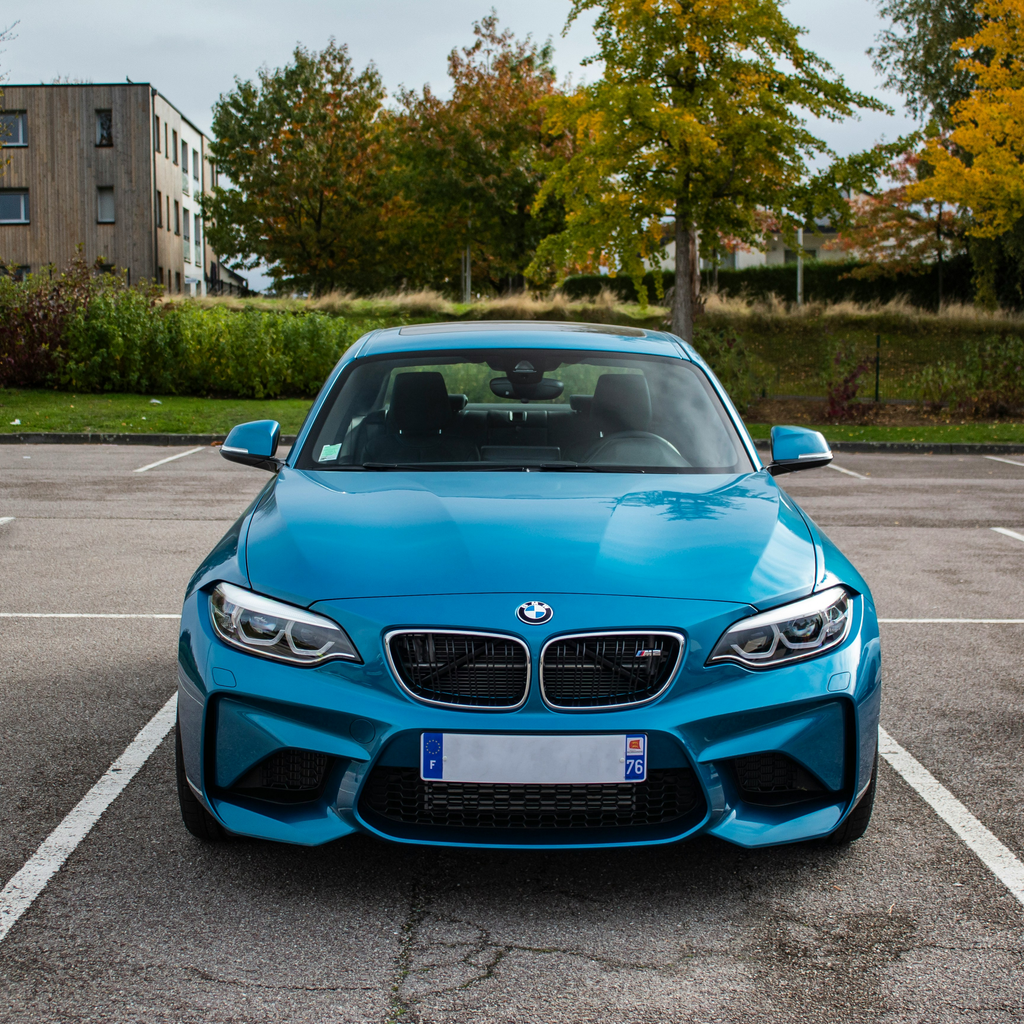
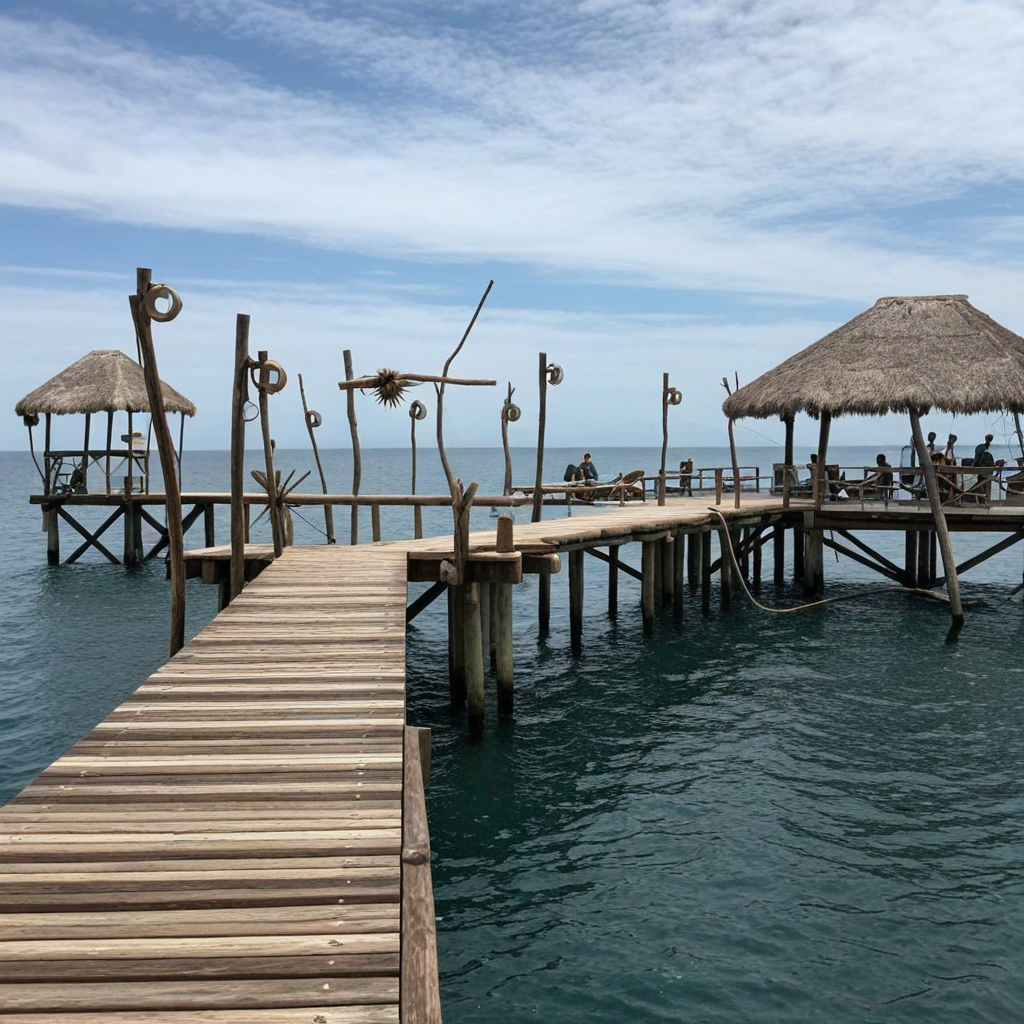
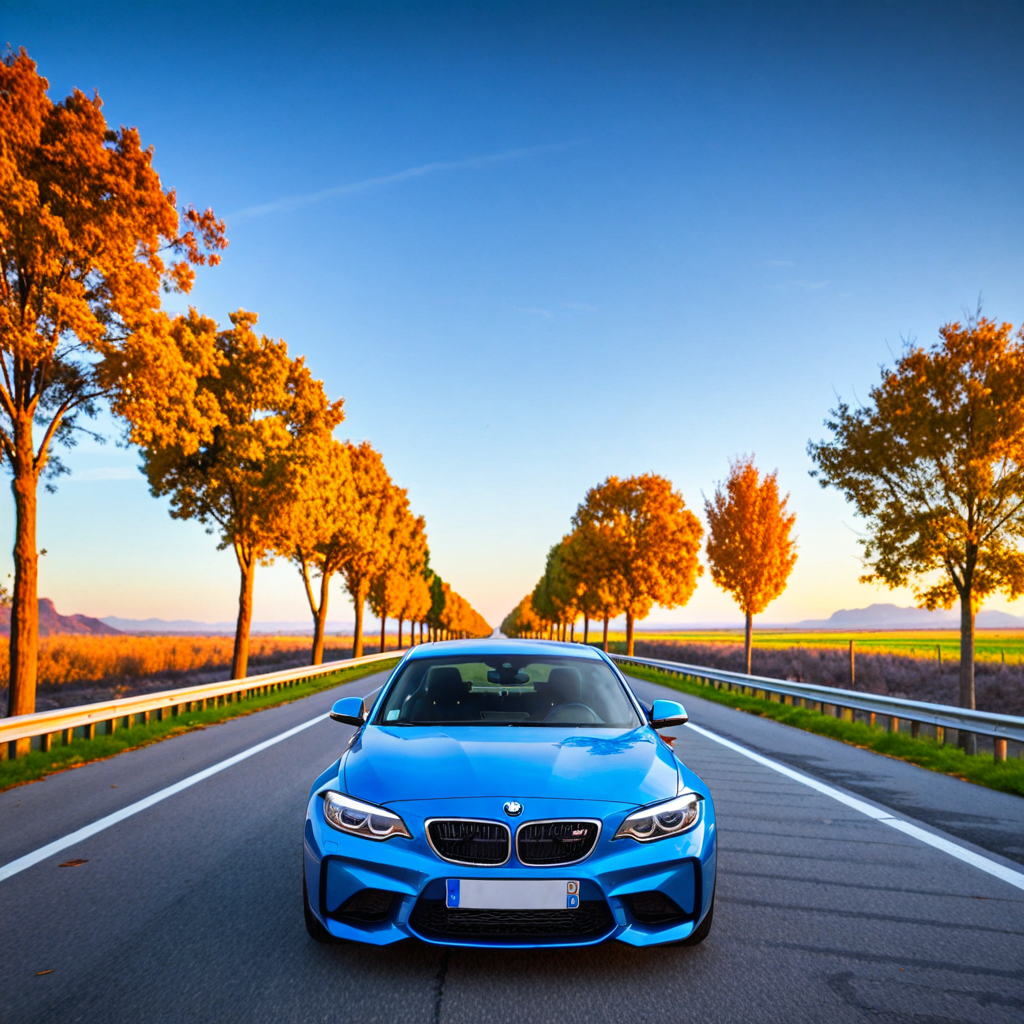
For this guide, I'll use these two images, which are a lot harder to composite than the common use case:
| Photo by Mathieu Renier on Unsplash | Photo by Karsten Würth on Unsplash |
|---|---|
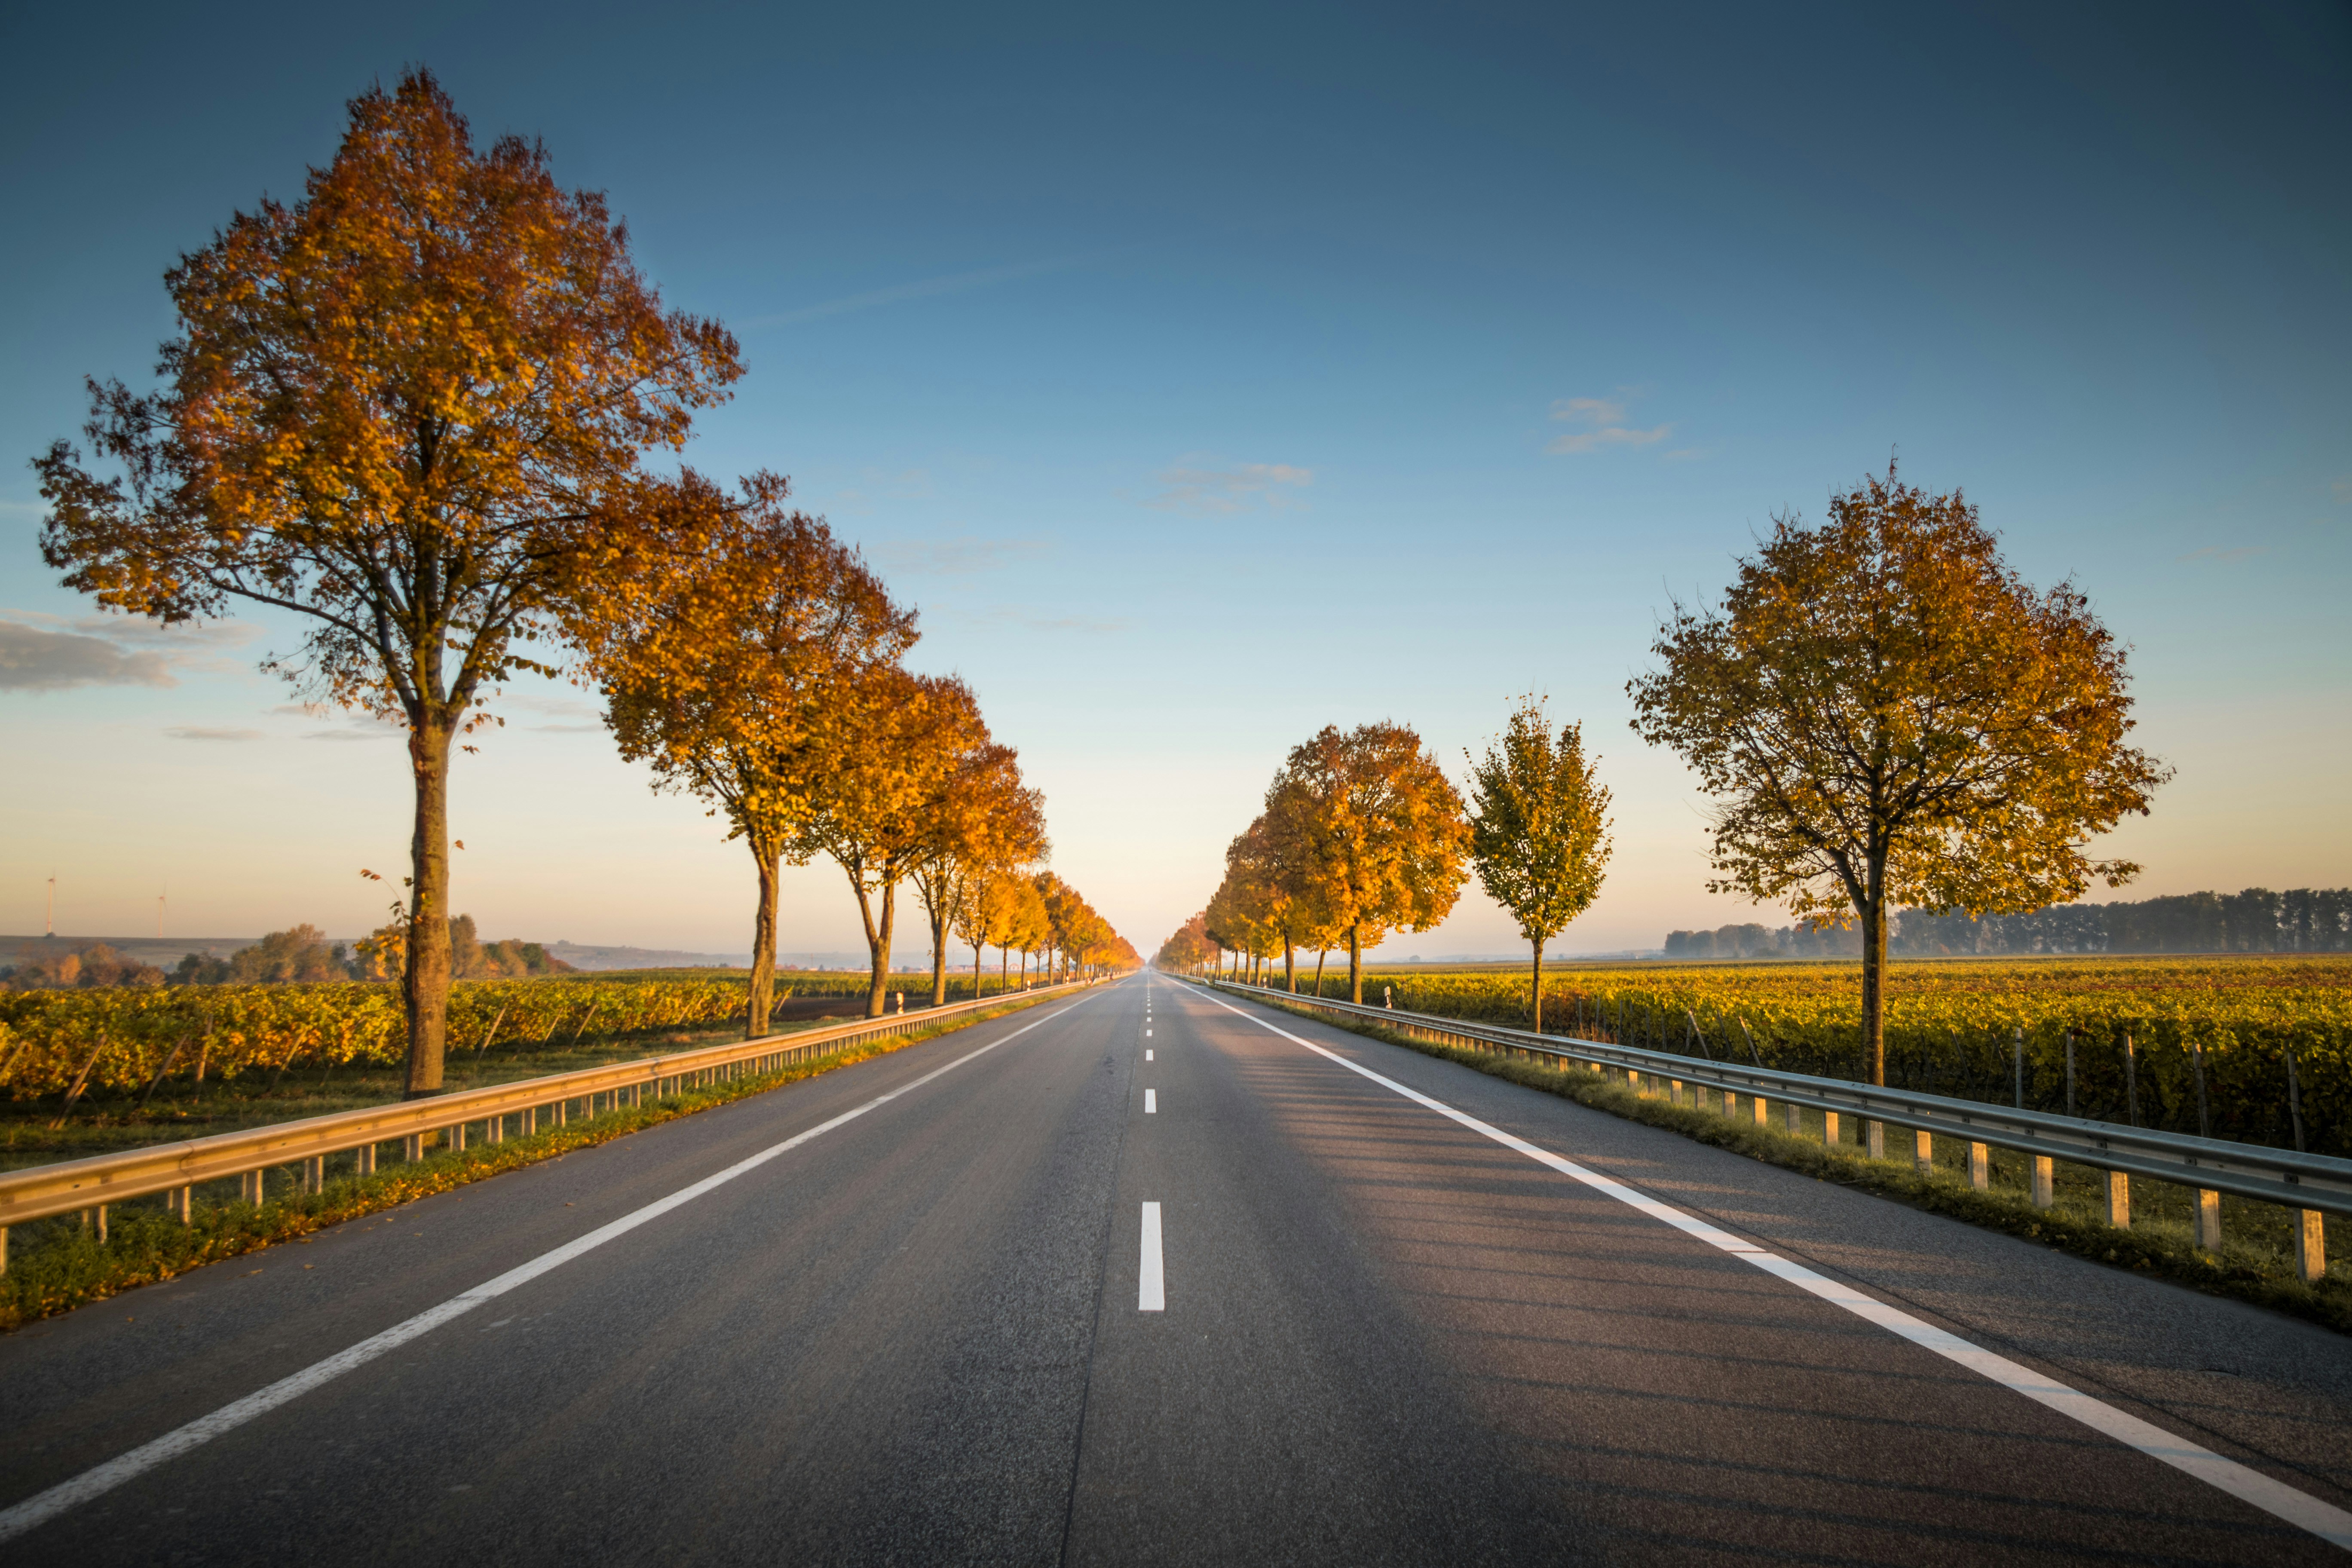 |
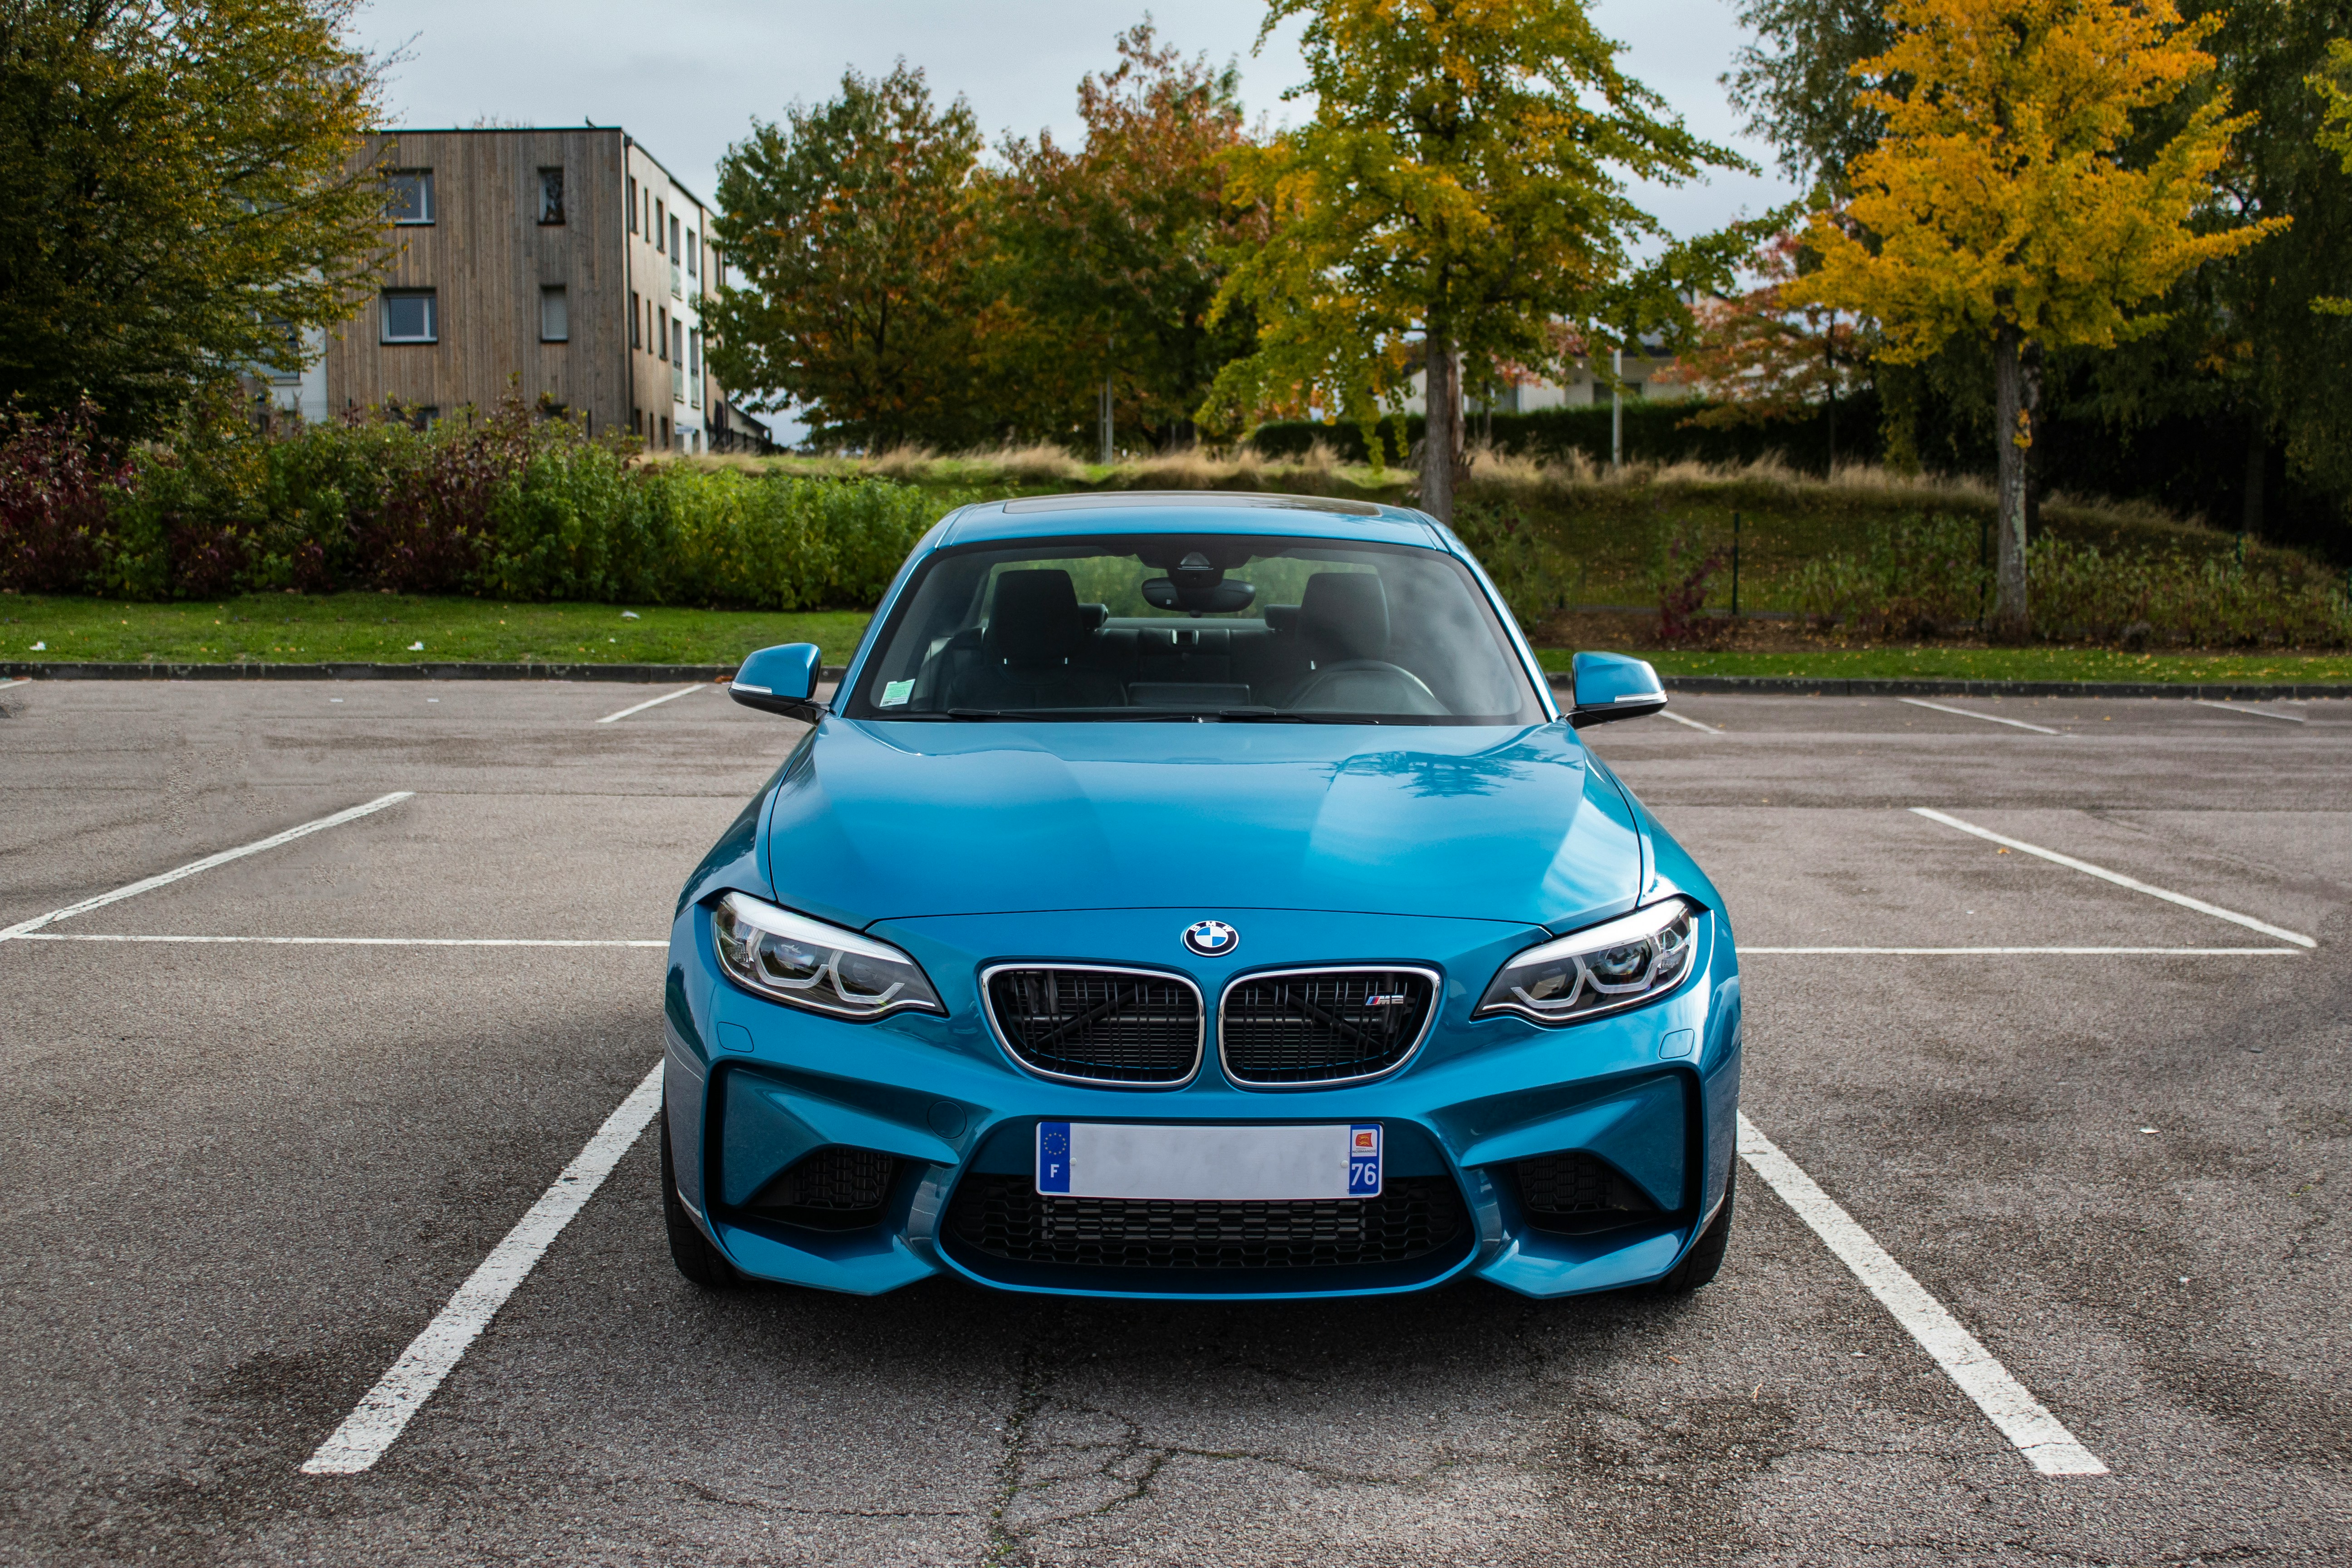 |
These images don't have the same aspect ratio, they don't share the same perspective or lighting, but they do share the same angle, which will make this easier. I won't go into details on how to do this, but essentially we will need to make them share the same perspective (matching their horizon lines), and later, we will need to do something about the lighting.
Resizing and cropping the images
For the first step, let's resize and crop the images so they have the same aspect ratio. This isn't that important for the foreground, but for simplicity we're going to do both:
def resize_and_crop(image: Image.Image, target_size):
    original_width, original_height = image.size

    # Depending on which side is the smallest, resize the image while maintaing the aspect ratio
    if original_width < original_height:
        new_width = target_size
        new_height = int(original_width * (target_size / original_width))
    else:
        new_height = target_size
        new_width = int(original_width * (target_size / original_height))

    resized_image = image.resize((new_width, new_height), resample=Image.Resampling.LANCZOS)

    # calculate the cropping coordenates
    left = (new_width - target_size) // 2
    top = (new_height - target_size) // 2
    right = left + target_size
    bottom = top + target_size

    # crop the image
    cropped_image = resized_image.crop((left, top, right, bottom))

    return cropped_image

original_bg = load_image(
    "https://huggingface.co/datasets/OzzyGT/testing-resources/resolve/main/image_compositing/karsten-wurth-rafblRbne3o-unsplash.jpg"
)

background = resize_and_crop(original_bg, 1024)

original_fg = load_image(
    "https://huggingface.co/datasets/OzzyGT/testing-resources/resolve/main/image_compositing/mathieu-renier-4WBvCqeMaDE-unsplash.jpg"
)
foreground = resize_and_crop(original_fg, 1024)
The resulting images are these:
| Background | Foreground |
|---|---|
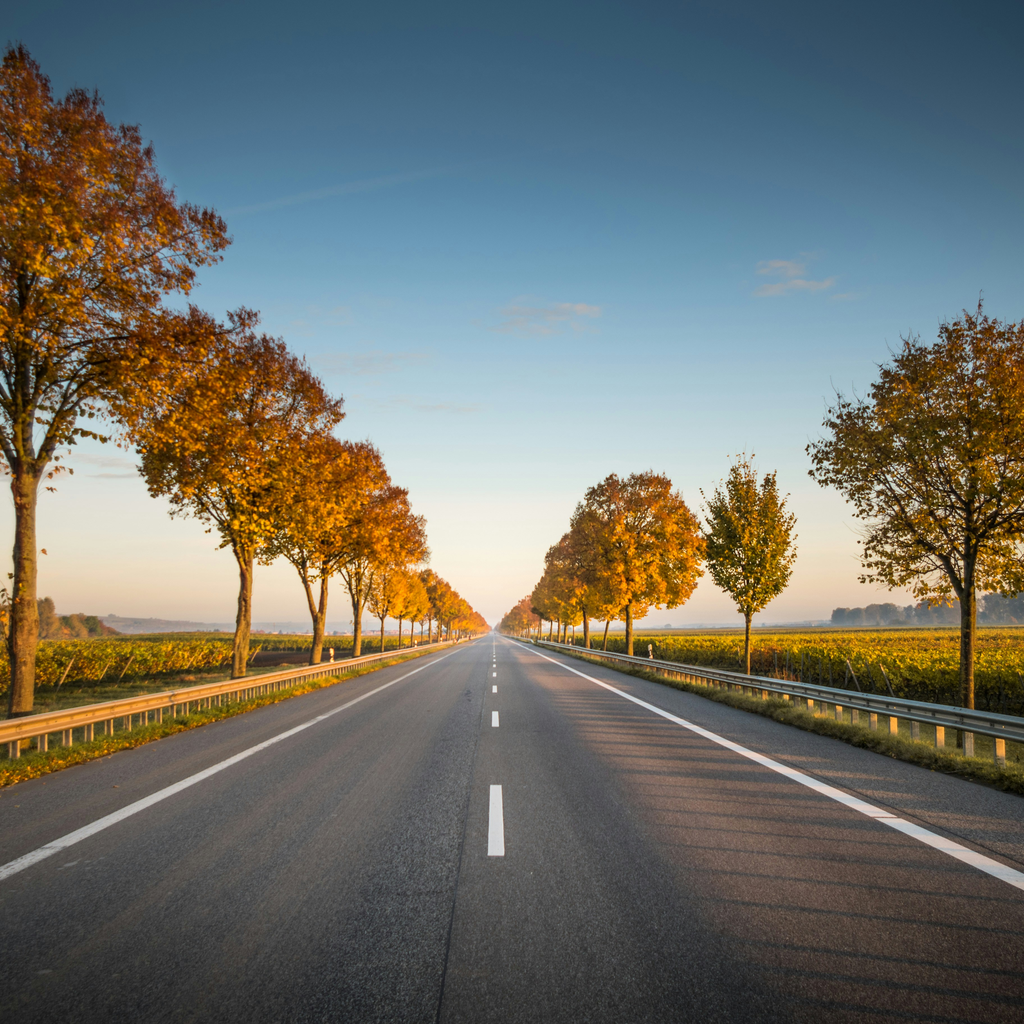 |
 |
Removing the background
The second step is to remove the background from the foreground. This part is really important, and the background remover should remove all the background. If there are some parts left, this won't work. You can use whatever tool you want for this, but for reproducibility I'm going to use BEN2, which I recently added to the image_gen_aux library.
Install the library with this command in your environment:
pip install git+https://github.com/huggingface/image_gen_aux
Now we can remove the background with this simple code:
from image_gen_aux import BEN2BackgroundRemover

bg_remover = BEN2BackgroundRemover.from_pretrained("PramaLLC/BEN2").to("cuda")
foreground = bg_remover(foreground)[0]
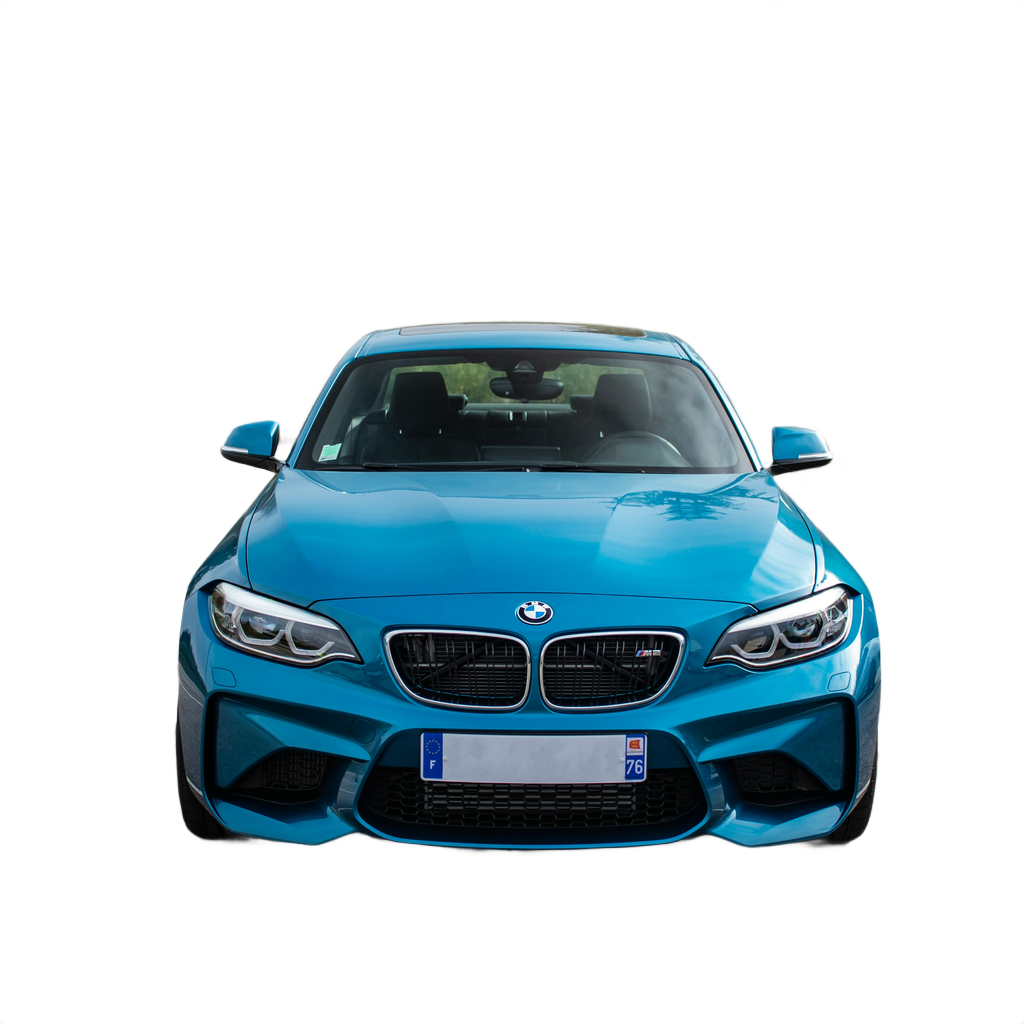
Notice that there are some traces of the background under the front wheels, but for this case it's not that important. The model will think those are the shadows it has to add. Also, there's some foliage behind the back window. I don't think any background remover will handle that part, so if you want perfection, that section will have to be manually erased or inpainted later.
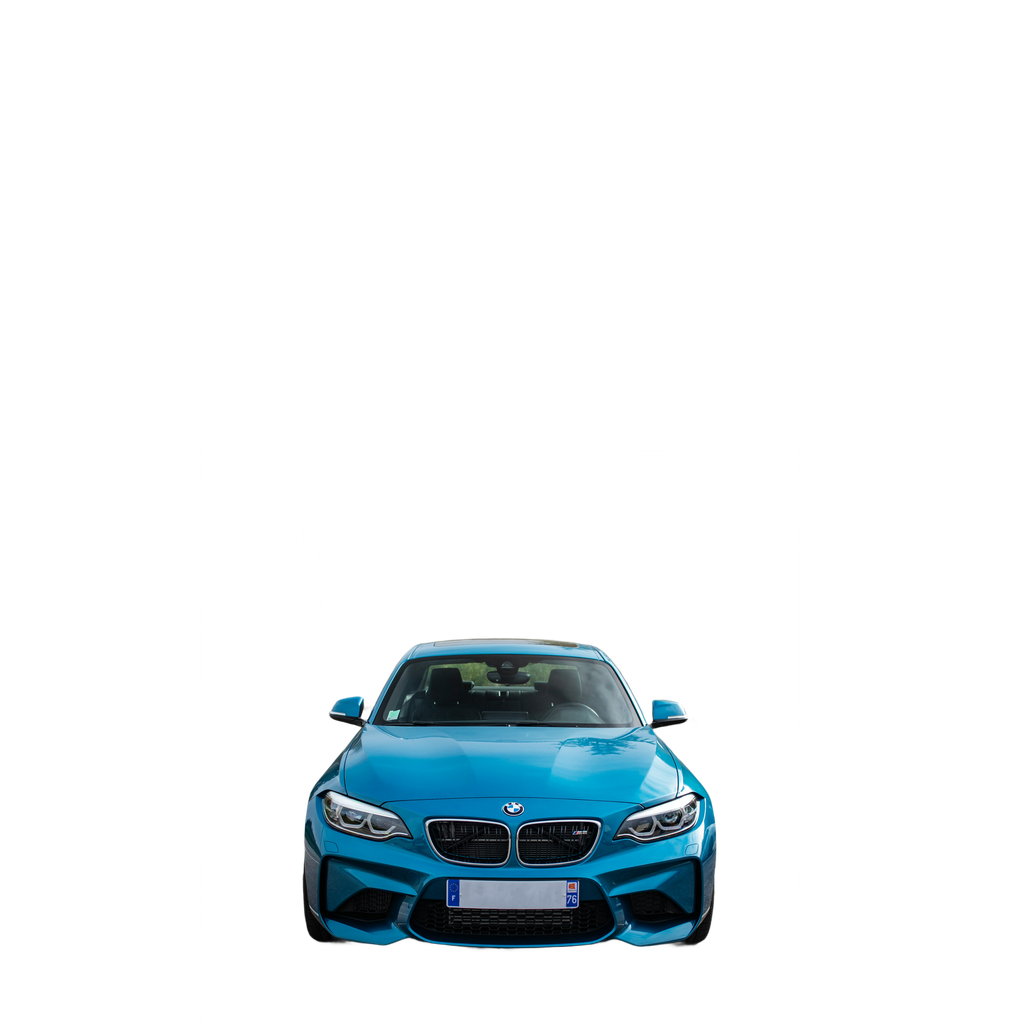
Composition
For the composition, we will need to resize the car again and move it into position. We will need two images: one with just the car for the inpainting ControlNet, and one with the car pasted over the background.
With this code we can generate both images:
# make the foreground image smaller
foreground_size = (600, 600)
foreground = foreground.resize(foreground_size, resample=Image.Resampling.LANCZOS)

# Create a new image with the same size as the background and paste the foreground onto it
new_foreground = Image.new("RGBA", background.size, (0, 0, 0, 0))
offset = (200, 450)
new_foreground.paste(foreground, offset)

# Combine the background and the new foreground
combined_image = Image.alpha_composite(background.convert("RGBA"), new_foreground)
We will now have both images like this:
| new foreground | combined |
|---|---|
 |
 |
The combined image is ugly, but it is what we need to tell the model what we want to do.
Mixed Teed preprocessor with Controlnet Union
The reason
What I learned from the very talented people who created the MistoLine Controlnet when I was integrating it with controlnet_aux is that you can mix two image preprocessors to get an even better result. Not long ago, this would have required training a ControlNet, but we now have Controlnet Union, which was trained with multiple conditions, in this case, edge detection and lines.
Because of this particular training, Controlnet Union can work if you mix the condition images. For example, you can use a depth map with lines, you can use a normal image as a depth map, or even mix all of them.
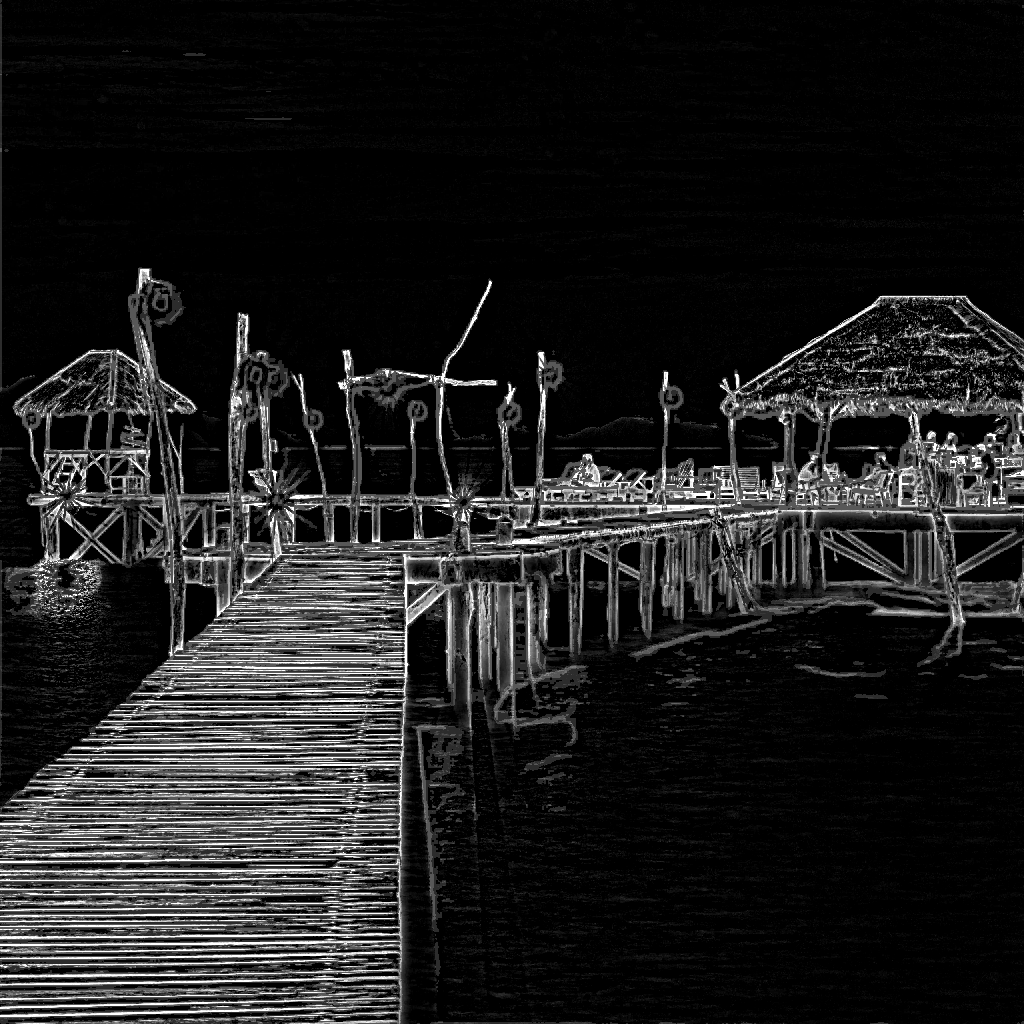
This led me to experiment with my own version of MistoLine with Controlnet Union, so we're going to use Teed for the contour and the bigger details, and Lineart Standard for the smaller details.
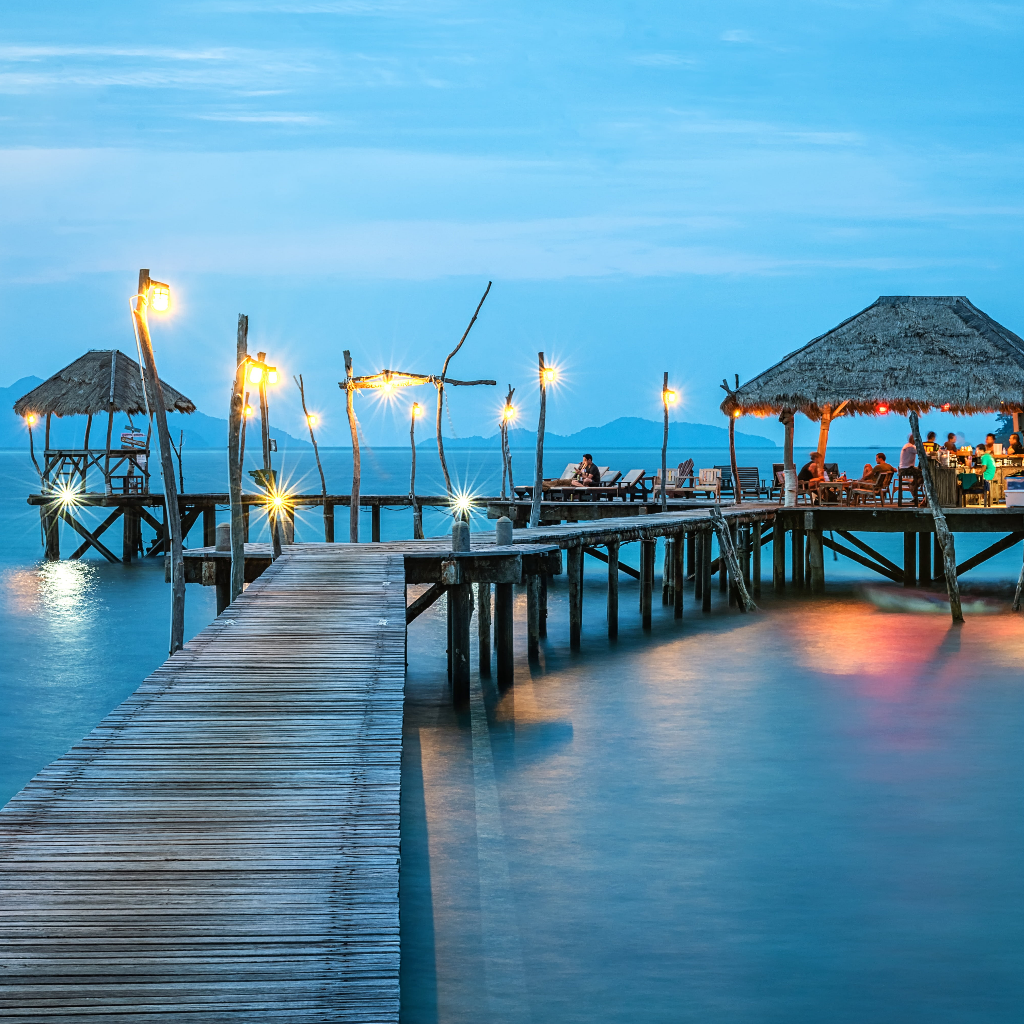
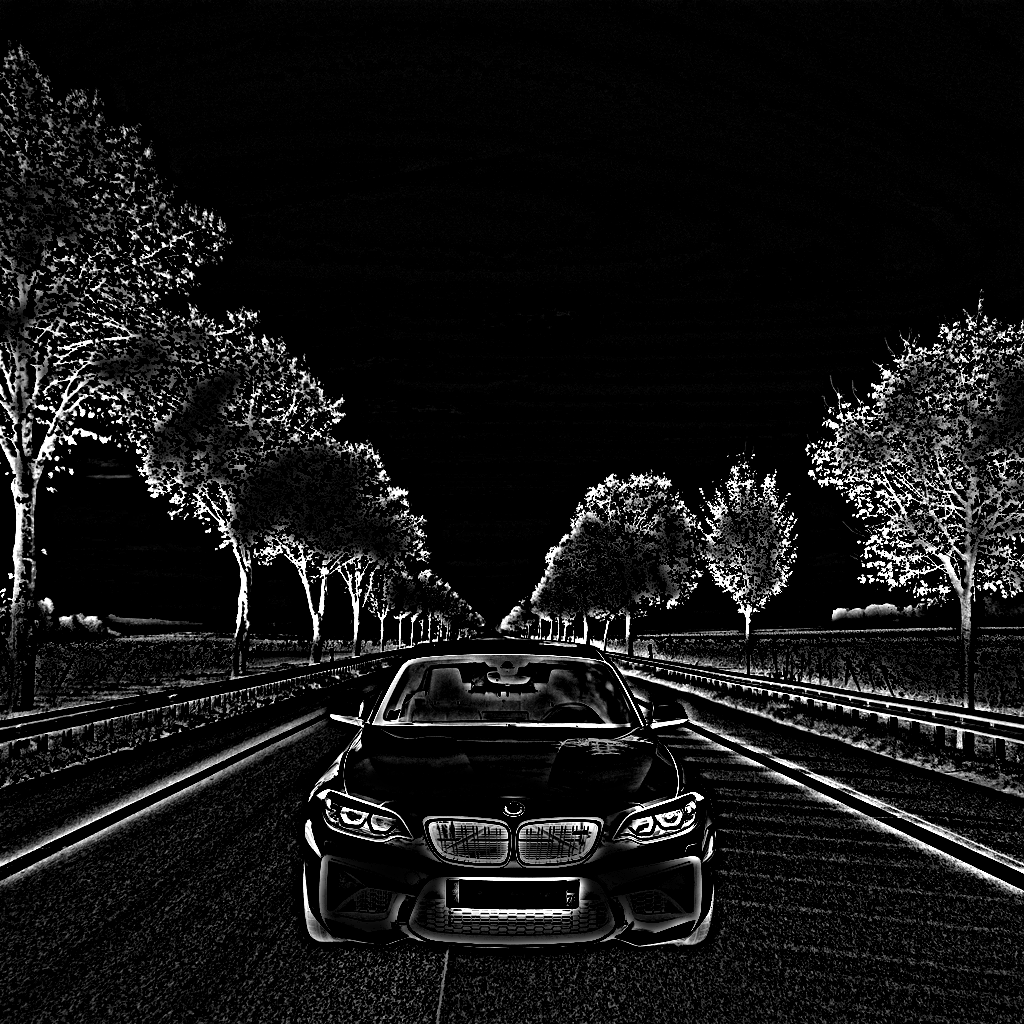
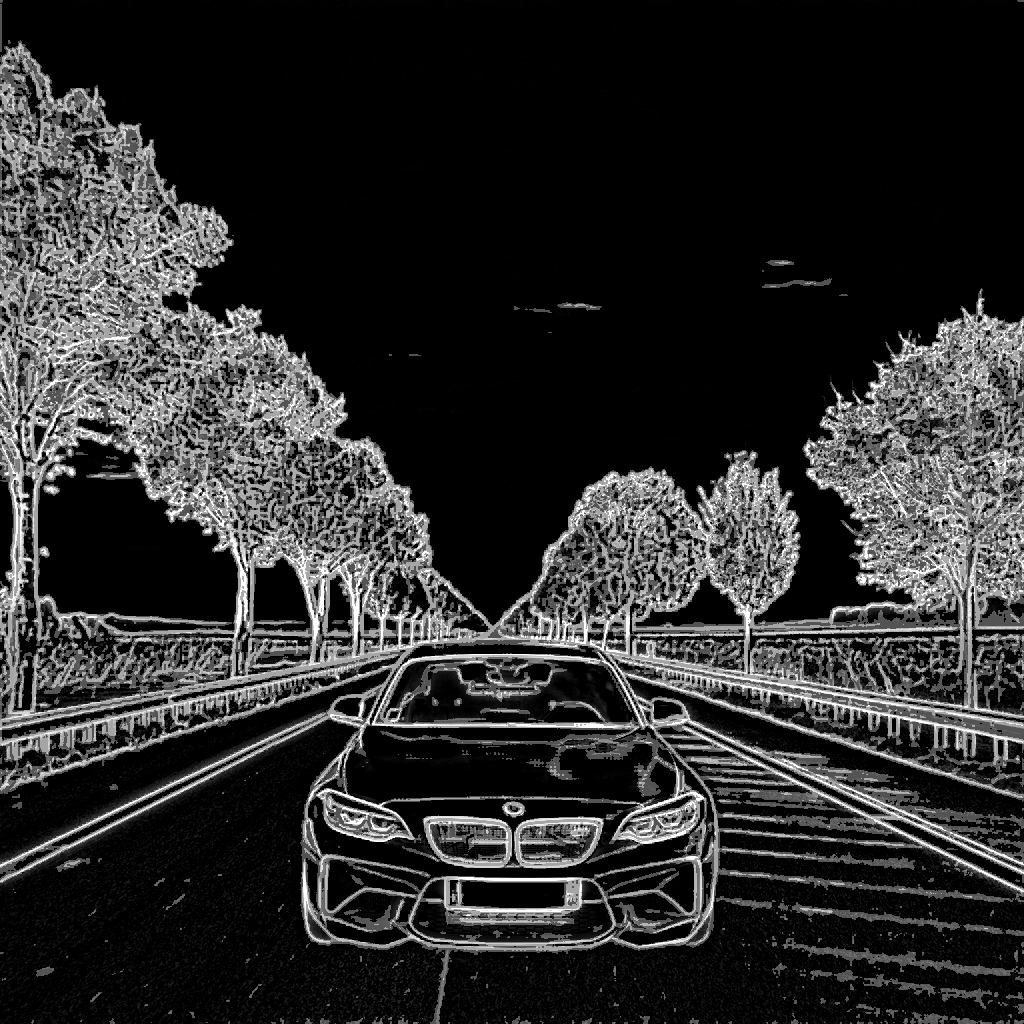
But with words it's hard to explain how it affects the generation. I'll do a quick example of what I mean with this image
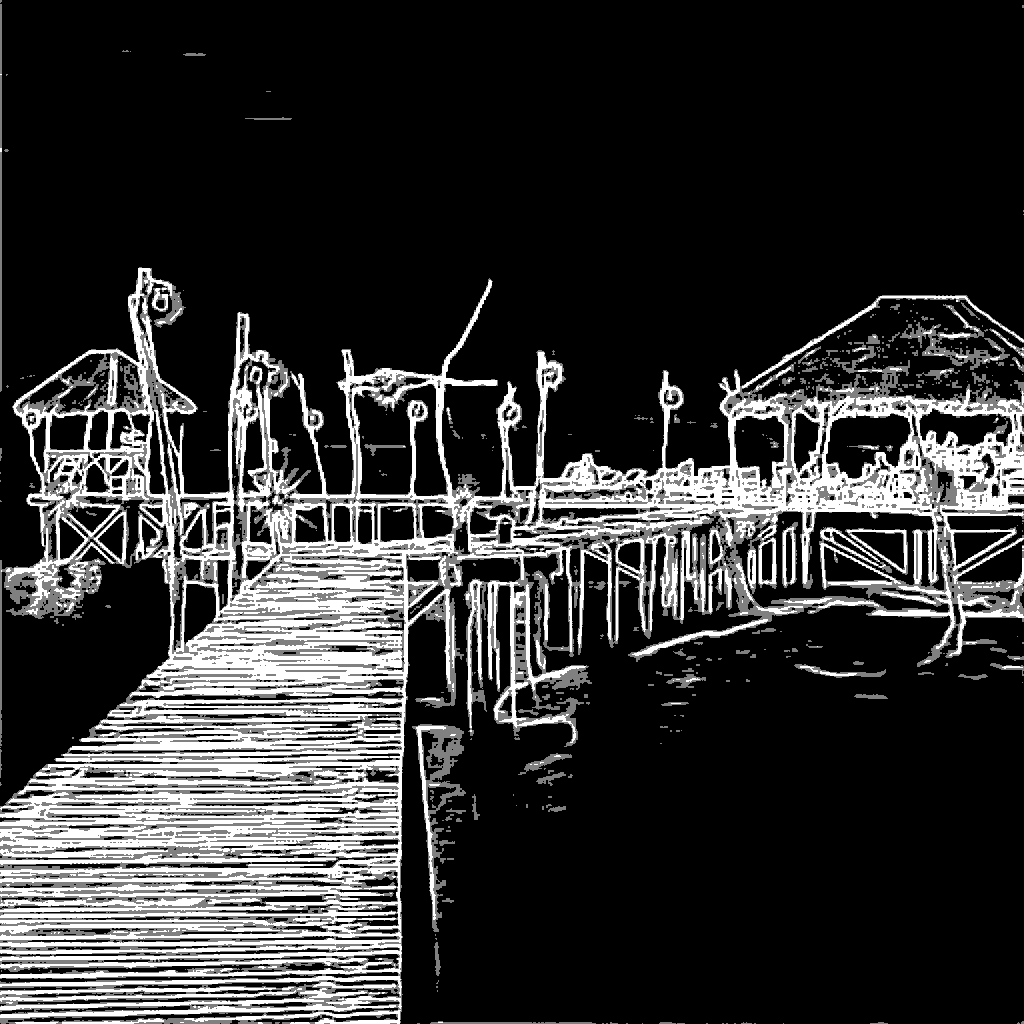
| Original Image | Just Teed | Mixed Teed with Lineart Standard |
|---|---|---|
 |
 |
 |
The results are very different:
| Just Teed | Mixed Teed with Lineart Standard |
|---|---|
 |
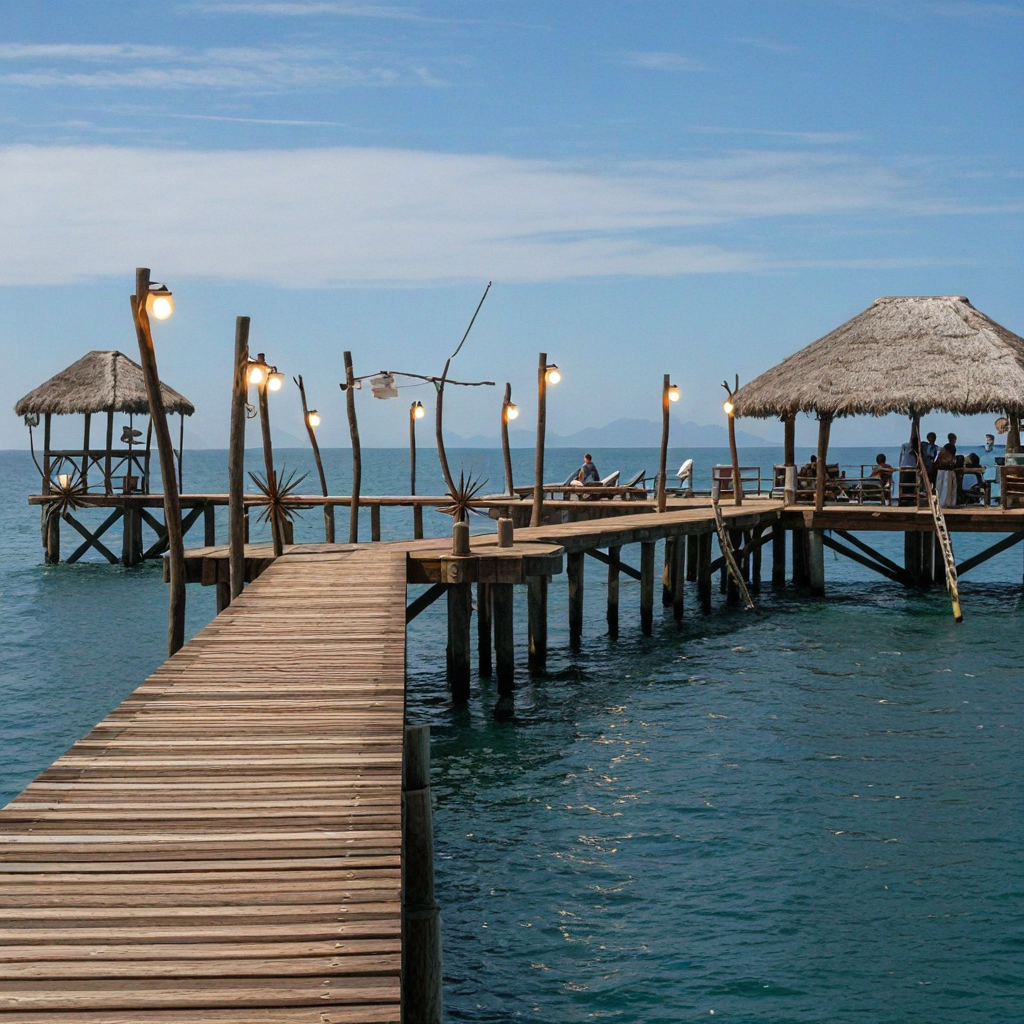 |
You can see how it brings back into the generation the shape of the clouds, the islands in the background, and most of the lights. This is crucial if you want to preserve the original image as much as possible.
The way I use it is by doing an alpha blending of Lineart Standard over the Teed one. I don't use a fixed percentage of alpha because I manually choose what looks best for me, but generally the values should be around 30% to 60%.
This is what I use and what helps me decide how much I want to mix them:
If you prefer another method or ControlNet, feel free to use it instead of this.
Using the mixed teed technique with Diffusers
For this particular case, I like it to be blended with a 0.35 alpha. We can achieve this with the following code:
from image_gen_aux import LineArtStandardPreprocessor, TeedPreprocessor
from image_gen_aux.utils import load_image
from PIL import Image


preprocessor = TeedPreprocessor.from_pretrained("OzzyGT/teed").to("cuda")
teed = preprocessor(combined_image)[0]

preprocessor = LineArtStandardPreprocessor()
linear_standard = preprocessor(combined_image)[0]

mixed_teed = Image.blend(teed, linear_standard, alpha=0.35)
The results:
| Teed | Lineart Standard | Mixed Teed |
|---|---|---|
 |
 |
 |
The generation
For the generation, I will use these models:
The reason for using that specific ControlNet is because of the training and the results. For the base model, I choose CyberRealistic because it is one of the best safe models for realistic images, and the DMD2 LoRA because it makes the image a lot more realistic with better textures and lighting. It also makes the generations really fast.
All of these models allow this solution to be used commercially without restrictions, if you want to use this technique in your app or as a service.
Let's first load the models:
import torch

from diffusers import ControlNetUnionModel, LCMScheduler, StableDiffusionXLControlNetUnionImg2ImgPipeline


# Alternative repository so we don't need special code to load the model
controlnet_model = ControlNetUnionModel.from_pretrained(
    "OzzyGT/controlnet-union-promax-sdxl-1.0",
    torch_dtype=torch.float16,
    variant="fp16",
)

# Diffusers format alternative repository
pipeline = StableDiffusionXLControlNetUnionImg2ImgPipeline.from_pretrained(
    "John6666/cyberrealistic-xl-v60-sdxl",
    controlnet=controlnet_model,
    torch_dtype=torch.float16,
).to("cuda")

# DMD2 lora needs to use the LCM for the best results
pipeline.scheduler = LCMScheduler.from_config(pipeline.scheduler.config)

# original DMD2 lora
pipeline.load_lora_weights("tianweiy/DMD2", weight_name="dmd2_sdxl_4step_lora_fp16.safetensors")
Now let's do some basic preparations for inference. I do a calculation to always keep the number of inference steps the same, just because I prefer it that way, along with a very basic prompt:
# calculate the inference steps
strength = 0.3
num_inference_steps = math.ceil(8 / strength)

# basic prompt
prompt = "high quality photo, detailed, 4k"
Now we can do a first inference to test the results.
# do inference
image = pipeline(
    prompt=prompt,
    guidance_scale=1.0, # no cfg
    num_inference_steps=num_inference_steps,
    image=combined_image, # img2img source
    strength=strength,
    controlnet_conditioning_scale=0.5,
    control_image=controlnet_image, # mixed teed image
    control_mode=2, # edge mode
).images[0]
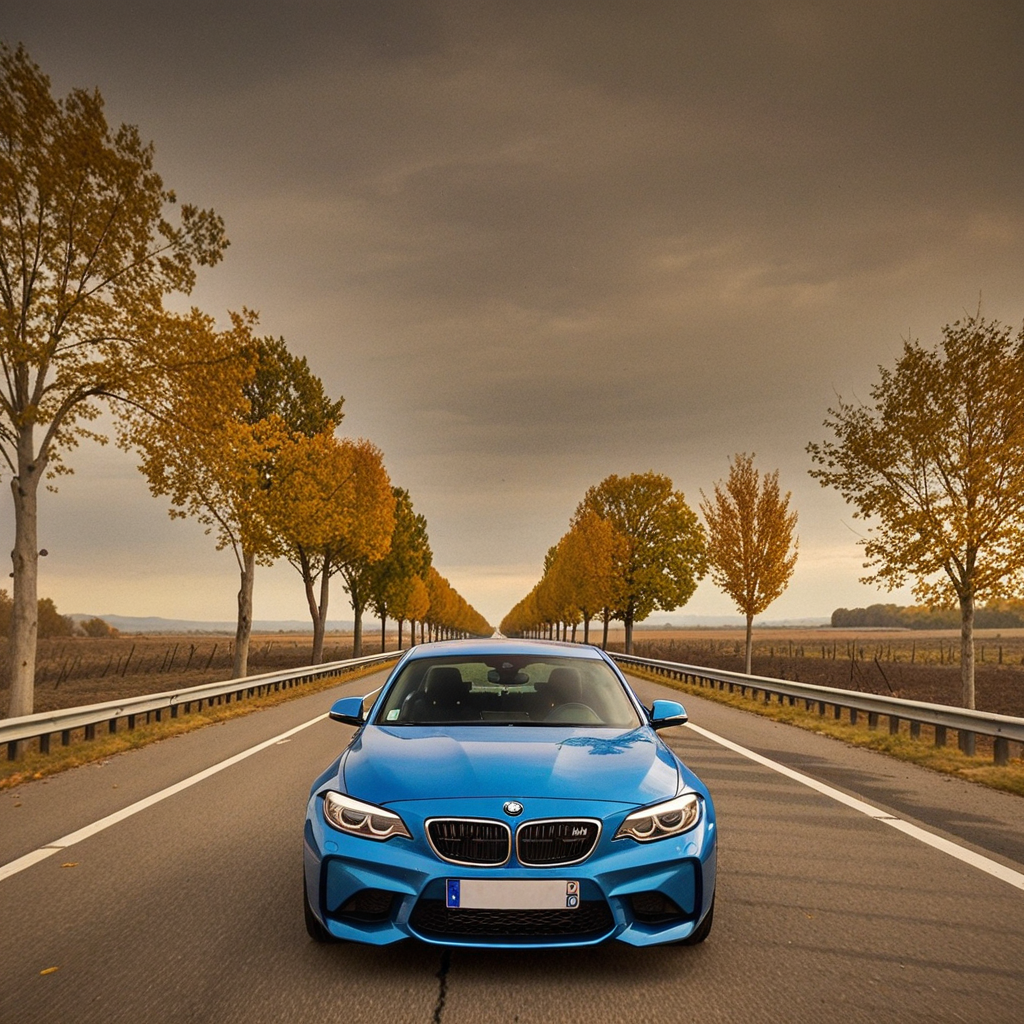
This is the result:
Not too bad, but it still looks like a bad composition. First, the car changed a bit and lost some details, and the lighting seems off. Take note that I specifically chose a really hard background to show this and to showcase one of the limitations of the SDXL VAE. I can fix the lighting, but the details of the trees are what make the difference with the newer models. Those trees would look a lot better with SD 3.5 or Flux.
Improvements
Let's fix the car first. To do this, we will use the image we prepared earlier with the inpaint mode. There's a small caveat here: if we use just one ControlNet with multiple conditions, the resulting image ends up having a border around the inpainting and significantly lower quality. I always use multiple ControlNets, so I don't really know if this is expected or not, but to get the best result, we will use multiple ControlNets.
# Diffusers format alternative repository
pipeline = StableDiffusionXLControlNetUnionImg2ImgPipeline.from_pretrained(
    "John6666/cyberrealistic-xl-v60-sdxl",
    controlnet=[controlnet_model, controlnet_model], # load multiple controlnets
    torch_dtype=torch.float16,
).to("cuda")

# do inference
image = pipeline(
    prompt=prompt,
    guidance_scale=1.0,  # no cfg
    num_inference_steps=num_inference_steps,
    image=combined_image,  # img2img source
    strength=strength,
    controlnet_conditioning_scale=[0.5, 0.5],
    control_image=[controlnet_image, new_foreground],  # mixed teed image, car
    control_mode=[2, 7],  # edge mode, inpaint mode
).images[0]
| Single ControlNet | Multi ControlNets |
|---|---|
 |
 |
The image looks a lot better now. If you want it to look more correct at this step, you will need to lower the 'strength' so the model has more freedom to change the background.
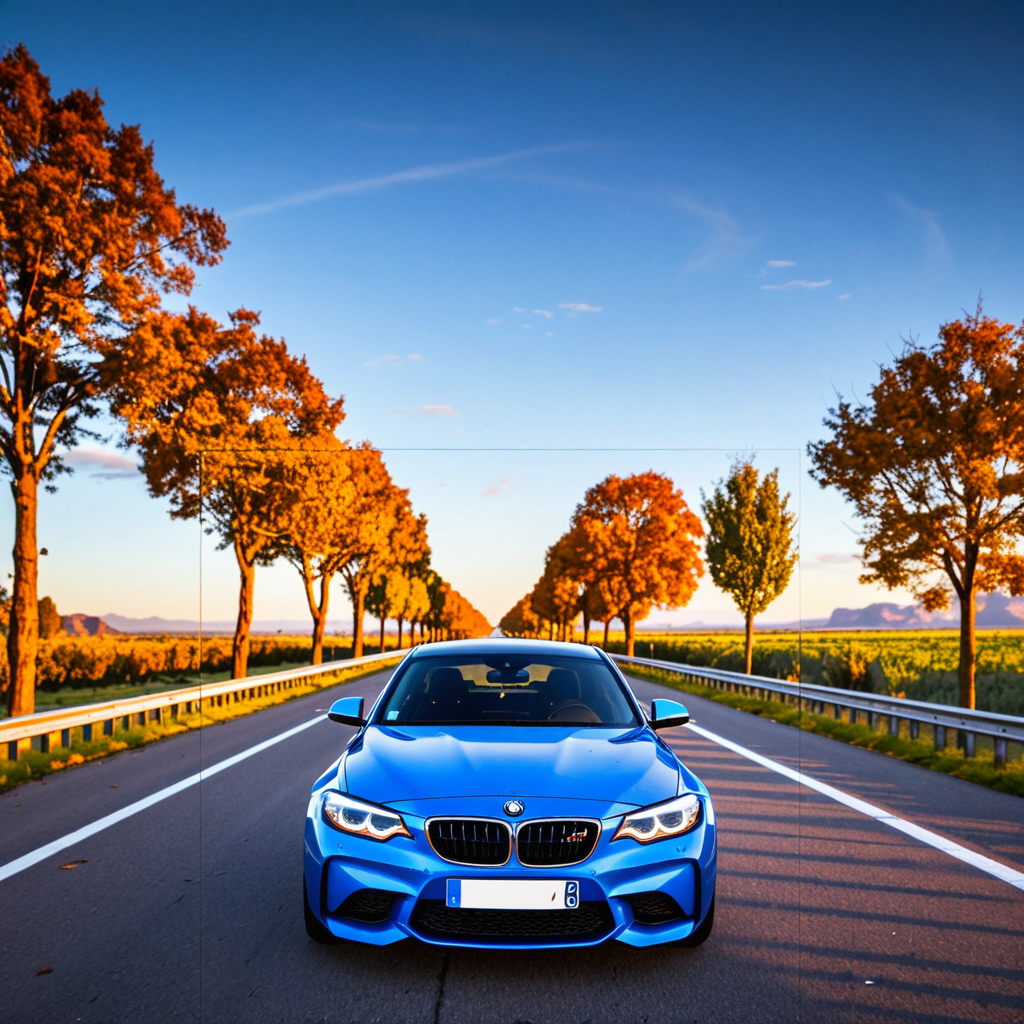
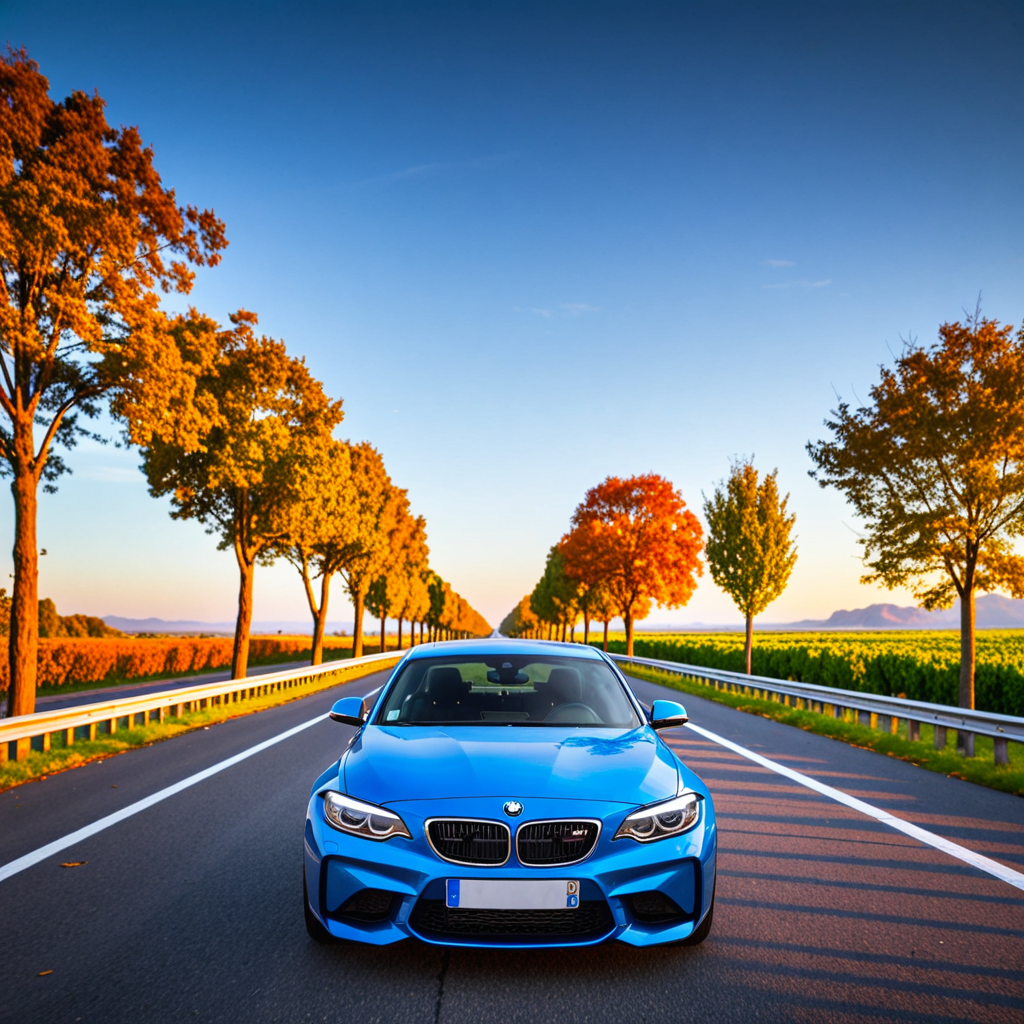
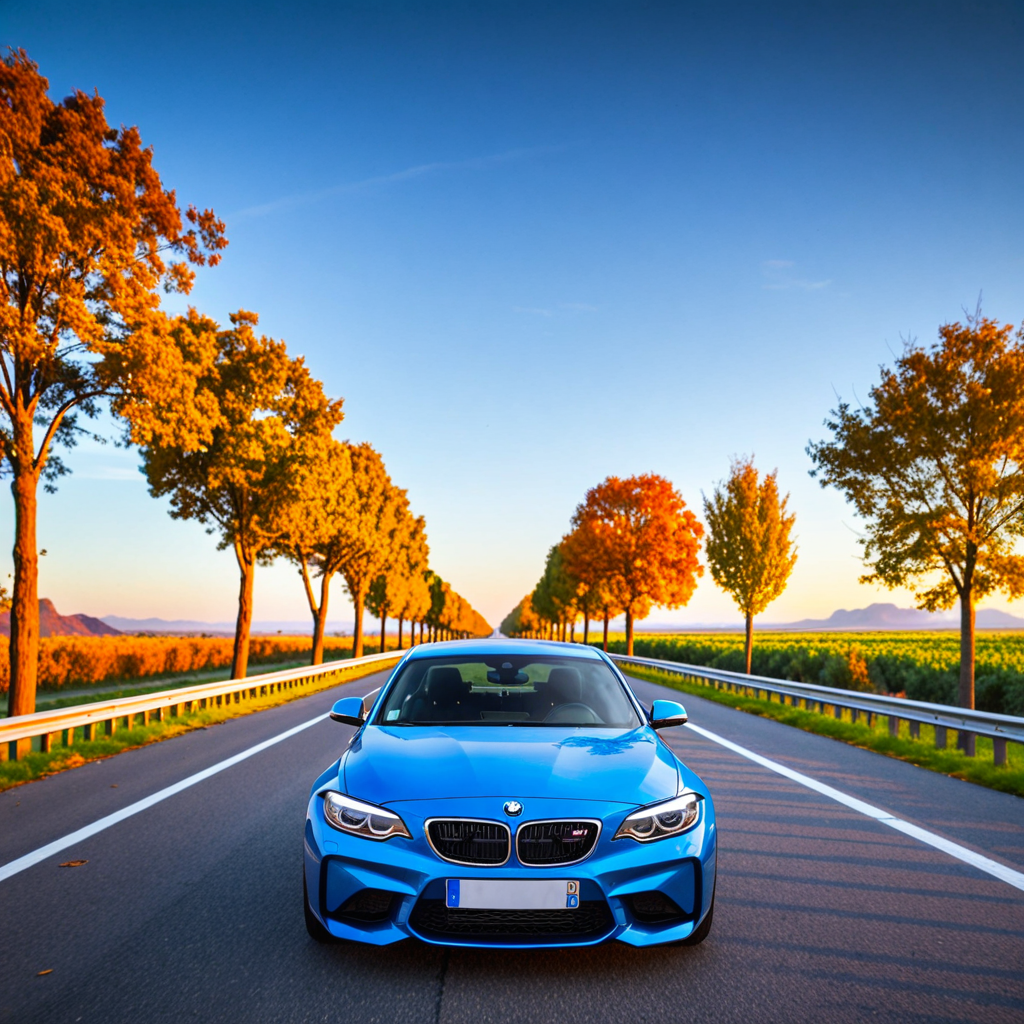
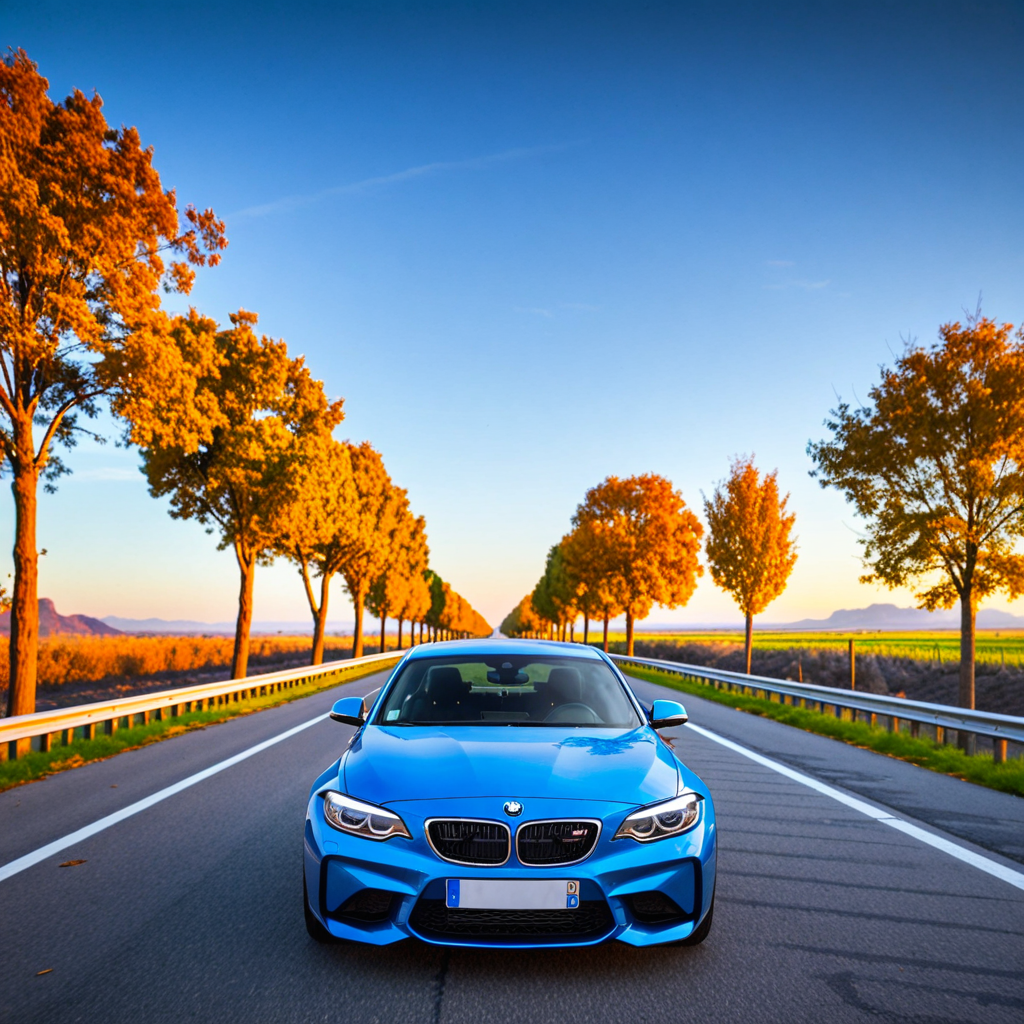
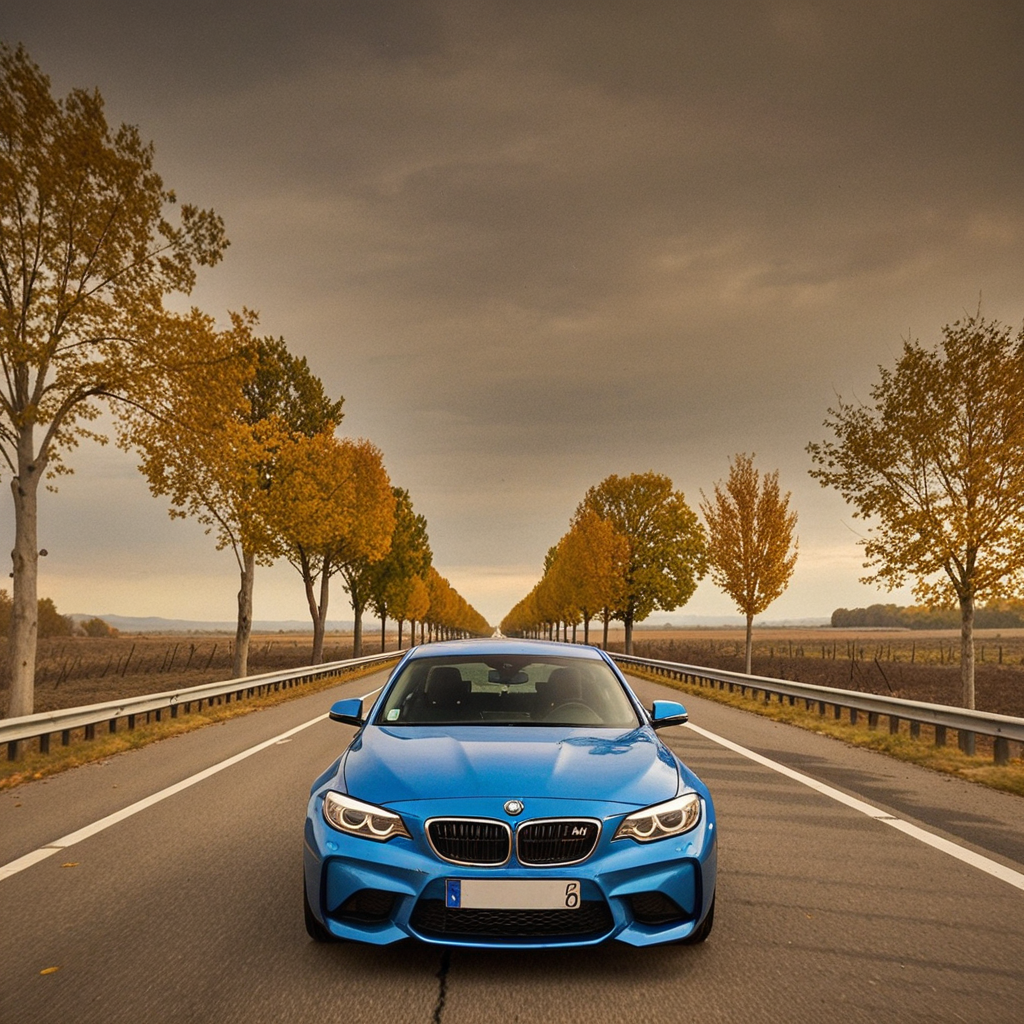
Images by strength:
| 0.3 | 0.4 | 0.45 | 0.5 |
|---|---|---|---|
 |
 |
 |
 |
As you can see, after 0.4, the background starts to drastically change. This is because the model begins matching the lighting of the background to the car. So if you want to preserve the original background, you will have to sacrifice this. The good part is that most people won't notice that the lighting is wrong in the '0.4 strength' image.
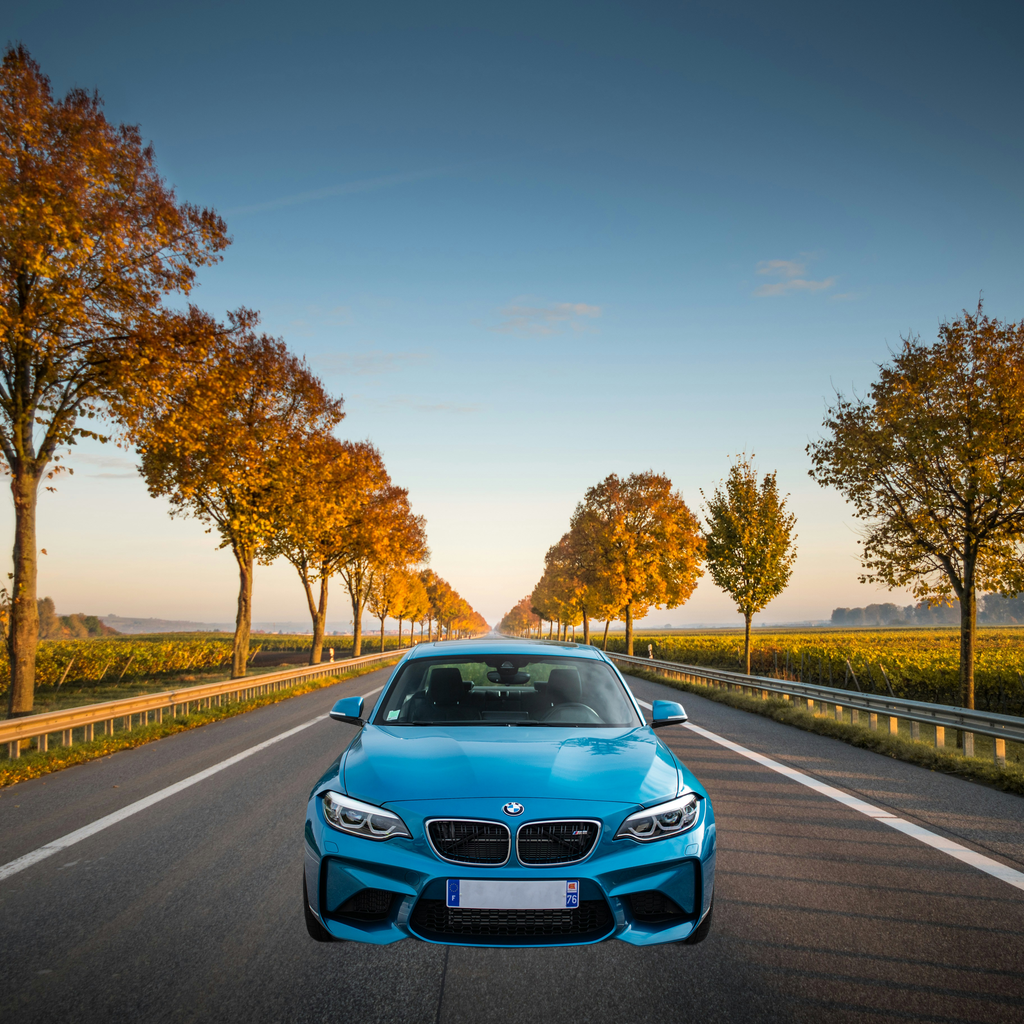
More manual improvements
The lighting of the image is wrong because the sun in the background is on the right, while in the car image it is above (I guess) and not as strong. The background is a golden hour warm-colored photo, and the car is from a colder, cloudy photo. This contrast between the images makes it hard for the model to blend them together, resulting in a burnt background with incorrect lighting for both.
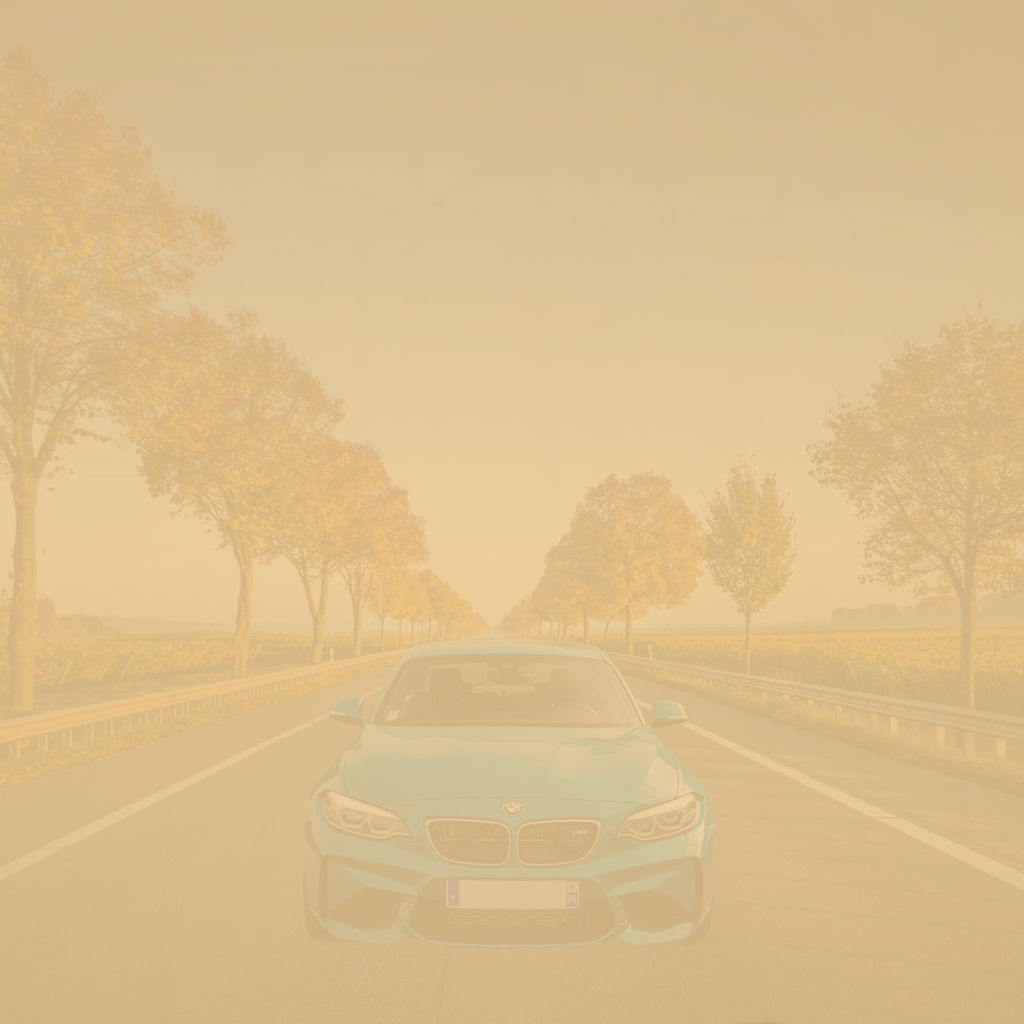
One way to fix this is to add the lighting ourselves. The way to do this is to add another image layer over the source image, with a percentage of alpha. I won’t go through the code for that here because it will make things more complex, but here are the images to show how it’s done and the result:
| color image | blended | result |
|---|---|---|
 |
 |
 |
Now the image looks a lot better, but the background changed with this, so it depends on your use case whether you can use it or not. I chose a warm color, but you can use blue to get a colder image.
Even with this, I can still see that the lighting on the car is not correct. This is because we’re using inpainting and preserving it. The only way to fix this is to let go of the original car a little. This will change it, so it depends on your use case whether you can do this or not.
We can control this with controlnet_guidance_end
| 1.0 | 0.9 | 0.8 |
|---|---|---|
 |
 |
 |
As you can see, the lower the guidance end is, the better the car blends in with the background.
Another option, which I won’t cover here because it’s not that easy to do with just code and not everyone can do it manually, is to paint over the car’s lighting.
Also, another option is to use a newer model as a refiner with low strength over the final image. You can use SD 3.5 or Flux for this, but if you’re using this for a commercial product, be mindful of the licenses these models have.
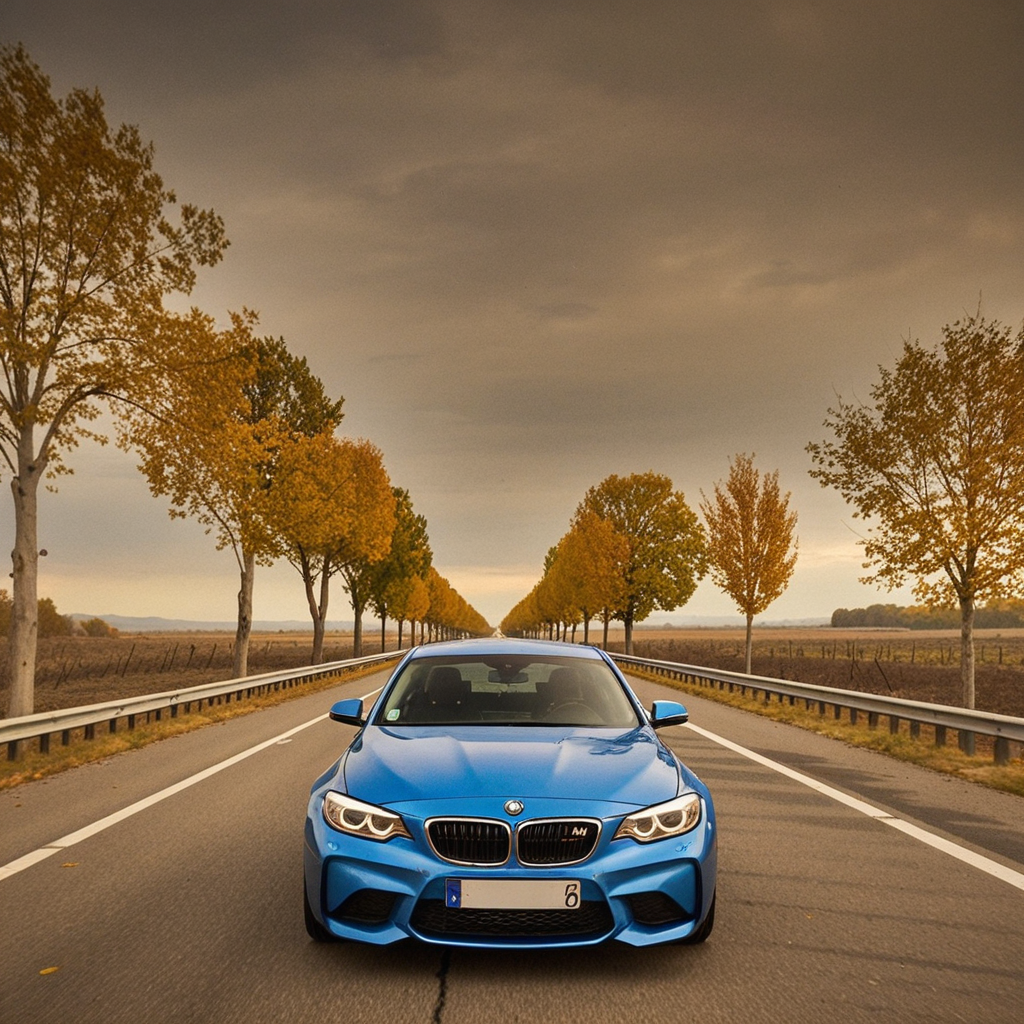
Final code
As promised, this is the complete code to get the result without the manual improvements. I hope this guide will help as a starting point on how to use diffusers and diffusion models for this specific task.
import math

import torch
from image_gen_aux import BEN2BackgroundRemover, LineArtStandardPreprocessor, TeedPreprocessor
from PIL import Image

from diffusers import ControlNetUnionModel, LCMScheduler, StableDiffusionXLControlNetUnionImg2ImgPipeline
from diffusers.utils import load_image


def resize_and_crop(image: Image.Image, target_size):
    original_width, original_height = image.size

    # Depending on which side is the smallest, resize the image while maintaing the aspect ratio
    if original_width < original_height:
        new_width = target_size
        new_height = int(original_width * (target_size / original_width))
    else:
        new_height = target_size
        new_width = int(original_width * (target_size / original_height))

    resized_image = image.resize((new_width, new_height), resample=Image.Resampling.LANCZOS)

    # calculate the cropping coordenates
    left = (new_width - target_size) // 2
    top = (new_height - target_size) // 2
    right = left + target_size
    bottom = top + target_size

    # crop the image
    cropped_image = resized_image.crop((left, top, right, bottom))

    return cropped_image


# load images
original_bg = load_image(
    "https://huggingface.co/datasets/OzzyGT/testing-resources/resolve/main/image_compositing/karsten-wurth-rafblRbne3o-unsplash.jpg"
)
original_fg = load_image(
    "https://huggingface.co/datasets/OzzyGT/testing-resources/resolve/main/image_compositing/mathieu-renier-4WBvCqeMaDE-unsplash.jpg"
)

# resize images
background = resize_and_crop(original_bg, 1024)
foreground = resize_and_crop(original_fg, 1024)

# remove background from foreground
bg_remover = BEN2BackgroundRemover.from_pretrained("PramaLLC/BEN2").to("cuda")
foreground_nobg = bg_remover(foreground)[0]

# make the foreground image smaller
foreground_size = (600, 600)
small_foreground_nobg = foreground_nobg.resize(foreground_size, resample=Image.Resampling.LANCZOS)

# Create a new image with the same size as the background and paste the foreground onto it
new_foreground = Image.new("RGBA", background.size, (0, 0, 0, 0))
offset = (200, 450)
new_foreground.paste(small_foreground_nobg, offset)

# Combine the background and the new foreground
combined_image = Image.alpha_composite(background.convert("RGBA"), new_foreground)
combined_image = combined_image.convert("RGB")

# Create the controlnet condition image
preprocessor = TeedPreprocessor.from_pretrained("OzzyGT/teed").to("cuda")
teed = preprocessor(combined_image)[0]

preprocessor = LineArtStandardPreprocessor()
linear_standard = preprocessor(combined_image)[0]

controlnet_image = Image.blend(teed, linear_standard, alpha=0.35)

# Alternative repository so we don't need special code to load the model
controlnet_model = ControlNetUnionModel.from_pretrained(
    "OzzyGT/controlnet-union-promax-sdxl-1.0",
    torch_dtype=torch.float16,
    variant="fp16",
)

# Diffusers format alternative repository
pipeline = StableDiffusionXLControlNetUnionImg2ImgPipeline.from_pretrained(
    "John6666/cyberrealistic-xl-v60-sdxl",
    controlnet=[controlnet_model, controlnet_model],  # load multiple controlnets
    torch_dtype=torch.float16,
).to("cuda")

# DMD2 lora needs to use the LCM for the best results
pipeline.scheduler = LCMScheduler.from_config(pipeline.scheduler.config)

# original DMD2 lora
pipeline.load_lora_weights("tianweiy/DMD2", weight_name="dmd2_sdxl_4step_lora_fp16.safetensors")

# calculate the inference steps
strength = 0.4
num_inference_steps = math.ceil(8 / strength)

# basic prompt
prompt = "high quality photo, detailed, 4k"

# do inference
image = pipeline(
    prompt=prompt,
    guidance_scale=1.0,  # no cfg
    num_inference_steps=num_inference_steps,
    image=combined_image,  # img2img source
    strength=strength,
    controlnet_conditioning_scale=[0.5, 0.5],
    control_image=[controlnet_image, new_foreground],  # mixed teed image, car
    control_mode=[2, 7],  # edge mode, inpaint mode
).images[0]

image.save("final_composition_image.png")