
| {"title": "Okta setup for Workbench", "url": "https://support.expel.io/hc/en-us/articles/1500002872662-Okta-setup-for-Workbench", "date": "2021-02-17T20:44:46Z", "contents": "This article explains how to connect Okta to Workbench.\n\n#### In this article\n\n * Step 1: Enable console access\n\n * Step 2: Generate API credentials\n\n * Step 3: Configure the technology in Workbench\n\n## Step 1: Enable console access\n\nHaving read-only access to the interface of your technology allows Expel to\ndig deeper during incident investigations. Our device health team uses this\naccess to investigate potential health issues with your tech.\n\n 1. Create a user in Okta for Expel.\n\n * Select Directory and People.\n\n * Under People select Add person.\n\n * User type: User\n\n * First name: Expel\n\n * Last name: SOC\n\n * Username: soc+<Your_Organization_Name>@expel.io\n\n### Tip\n\nYes, the \"+\" sign is part of the email address, and it's important. Click here\nto find out why.\n\n * Primary email: same as username\n\n * Password: set by user\n\n * Select Send user activation email now.\n\n * Click Save.\n\n 2. Notify your customer success engineer that the registration email is sent.\n\n## Step 2: Generate API credentials\n\nTo integrate the technology with Workbench, we need to create secure\ncredentials to the API.\n\n 1. Sign into your Okta organization as a user with Read-Only Admin privileges. API tokens have the same permissions as the user who creates them, and if the user permissions change, the API token permissions also change.\n\n * Okta permissions table:\n\nhttps://help.okta.com/oie/en-us/Content/Topics/Security/administrators-admin-\ncomparison.htm\n\n 2. Open the API page.\n\n * If you use the Developer Console, select Tokens from the API menu.\n\n * If you use the Administrator Console (Classic UI), select API from the Security menu, and then select Tokens.\n\n 3. Click Create Token.\n\n 4. Name your token ExpelAPI and click Create Token.\n\n### Note\n\nMake note of your API token, as you only see it 1 time.\n\n 5. Collect your Okta URL (also called an Okta domain).\n\n * Sign in to your Okta organization with your administrator account.\n\n * Look for the Okta domain in the upper right corner of the dashboard.\n\n## Step 3: Configure the technology in Workbench\n\nNow that we have the correct access configured and noted the credentials, we\ncan integrate your tech with Workbench.\n\n 1. Log into https://workbench.expel.io.\n\n 2. Navigate to Settings > Security Devices.\n\n 3. At the top of the page, click Add New Device.\n\n 4. Search for and select Okta.\n\n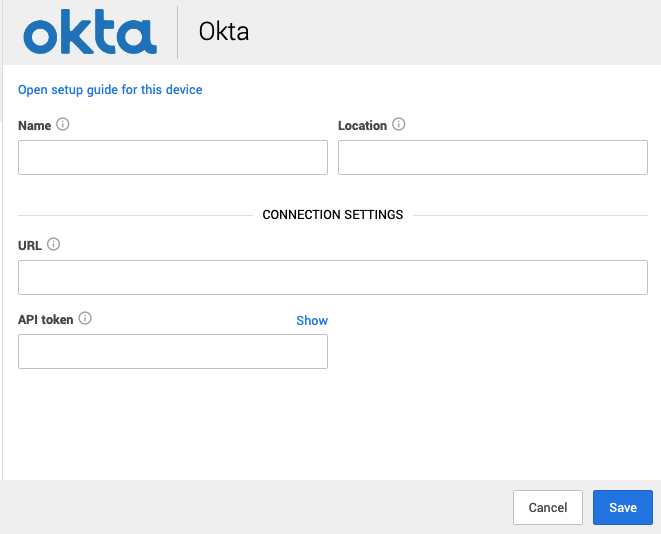\n\n * Complete all fields using the credentials and information you collected in Step 1 and Step 2.\n\n 5. Click Save.\n\nYou can see if the device is healthy on the Security Devices page. It may take\na few minutes to see the device listed as healthy.\n\nTo check if alerts are coming through, navigate to the Alerts Analysis page.\nScroll to the device you want to check and click View alerts. Switch to grid\nview, then check the list for device alerts. It can take 36 to 72 hours for\nalerts to appear after setup, as we tune your device.\n\n### Tip\n\nThis article was accurate at the time of writing, but changes happen. If you\nfind the instructions are outdated, leave a description in the comment field\nbelow and let us know!\n\n"} |