AWS Trainium & Inferentia documentation
Get started on Amazon EC2
Get started on Amazon EC2
The simplest way to work with AWS Trainium or Inferentia and Optimum Neuron on Amazon EC2 is the Hugging Face Neuron Deep Learning AMI (DLAMI). The DLAMI comes with all required libraries pre-packaged for you, including the Neuron Drivers, Transformers, Datasets, and Accelerate. The HF DLAMI is provided at no additional charge to Amazon EC2 users.
Optimum Neuron supports Inf1, Inf2, Trn1 and Trn2, all accessible on Amazon EC2. You can find all the specifications of the Trn and Inf instances here, in the “Accelerated Computing” section.
In this guide, we will show you:
- How to create an AWS Trainium or Inferentia instance on Amazon EC2 with the HF DLAMI
- How to set up your remote development environment
Create an AWS Trainium or Inferentia instance on Amazon EC2 with the HF DLAMI
Before creating the EC2 instance, make sure you are in a supported region for the instance you selected and that you have quota in your AWS account.
Find a supported region
Here is the list of regions that support at least one type of Trainium or Inferentia2 instance, as of February 2025:
- us-east-1: US East (N. Virginia)
- us-east-2: US East (Ohio)
- us-west-2: US West (Oregon)
- ap-south-1: Asia Pacific (Mumbai)
- ap-northeast-1: Asia Pacific (Tokyo)
- ap-southeast-1: Asia Pacific (Singapore)
- ap-southeast-2: Asia Pacific (Sydney)
- ap-southeast-4: Asia Pacific (Melbourne)
- eu-north-1: Europe (Stockholm)
- eu-west-3: Europe (Paris)
- eu-west-2: Europe (London)
- eu-west-1: Europe (Ireland)
- eu-central-1: Europe (Frankfurt)
- sa-east-1: South America (Sao Paulo)
Here is a Python script that lets you pull the latest supported instance type in each region you have enabled:
import boto3
from datetime import datetime

ec2 = boto3.client('ec2')

regions = [region['RegionName'] for region in ec2.describe_regions()['Regions']]


#Edit this line to change the instance types displayed
instance_types = ['trn1.32xlarge', 'trn1.2xlarge', 'inf2.48xlarge', 'inf2.24xlarge', 'inf2.8xlarge', 'inf2.xlarge', 'trn2.48xlarge']

supported_regions = {}

for region in regions:
   ec2_region = boto3.client('ec2', region_name=region)
   response = ec2_region.describe_instance_type_offerings(
      #LocationType='availability-zone',
      Filters=[
        {'Name': 'instance-type', 'Values': instance_types},
      ]
   )
   if response['InstanceTypeOfferings']:
      supported_regions[region] = [offer['InstanceType'] for offer in response['InstanceTypeOfferings']]

print('# Supported Regions as of',datetime.now().strftime('%B %d, %Y'))
print('================')


client = boto3.client('ssm')

for region, instance_types in supported_regions.items():
    try:
        response = client.get_parameter(Name=f'/aws/service/global-infrastructure/regions/{region}/longName')
        region_long_name = response['Parameter']['Value']
    except (client.exceptions.ParameterNotFound, KeyError):
        region_long_name = region
    print(f' * {region}: {region_long_name}')
    for instance_type in instance_types:
      print(f'  - {instance_type}')
    print('\n')
Increase service quota
Now that you selected your region and that you switched to it, you can request a Service Quota increase through the AWS Console by navigating to Service Quota, AWS services in the left panel, search for Amazon EC2, then “trn” or “inf”. You are able to request quota increase for On-Demand and Spot instances separately.
By default, all quotas are 0 for Inferentia and Trainium. There is no charge for increased quotas. There are separate quotas for Inferentia and Trainium, and separate quotas for spot and on-demand. Quotas refer to the maximum TOTAL number of vCPUs assigned to each instance type.
For example, a quota of 192 will let you run a single inf2.48xlarge, two inf2.24xlarges, six inf2.8xlarges, or forty-eight of the inf2.xlarges. It will also let you run inf1 instance types. Similarly for Trainium, a quota of 128 will let you run a single trn1n.32xlarge or trn1.32xlarge, but it will also let you run sixteen trn1.2xlarge.
Launch the Amazon EC2 instance with the HF DLAMI
Let’s deploy a trn1.2xlarge instance in the us-east-1 region (North Virginia) through the EC2 console.
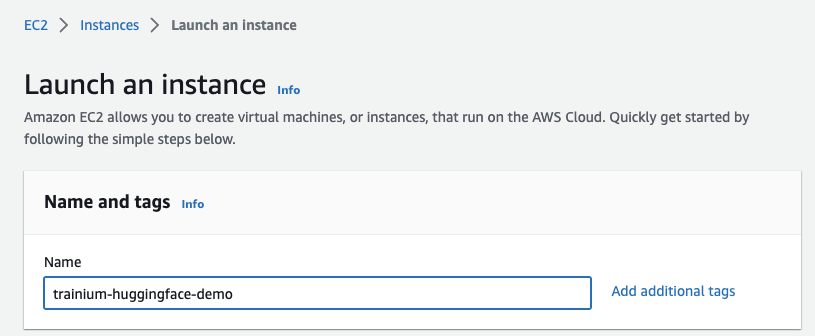
First, click on Launch instance and define a name for the instance (trainium-huggingface-demo).
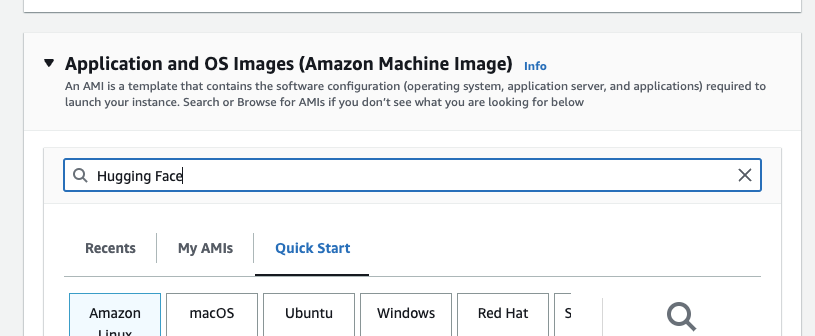
Next, you search the Amazon Marketplace for Hugging Face AMIs. Entering “Hugging Face” in the search bar for “Application and OS Images” and hitting “enter”.
This should now open the “Choose an Amazon Machine Image” view with the search. You can now navigate to “AWS Marketplace AMIs” and find the Hugging Face Neuron Deep Learning AMI and click select.
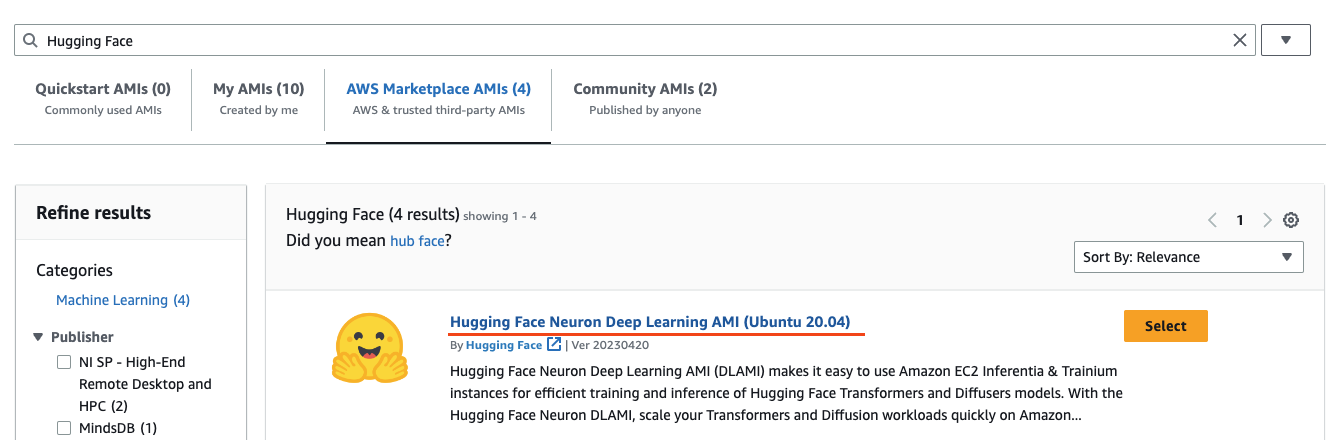
You will be asked to subscribe if you aren’t. The AMI is completely free of charge, and you will only pay for the EC2 compute.
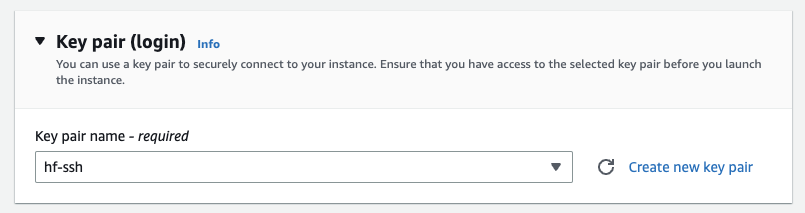
Then you need to define a key pair, which will be used to connect to the instance via ssh. You can create one in place if you don’t have a key pair.
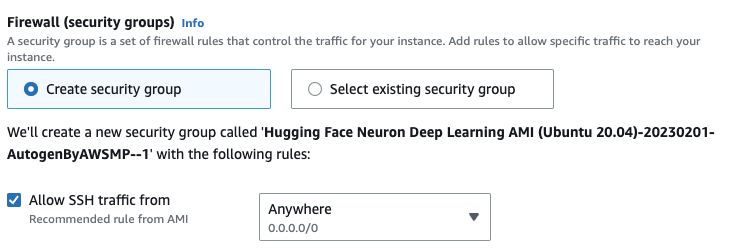
After that, create or select a security group which allows ssh traffic.
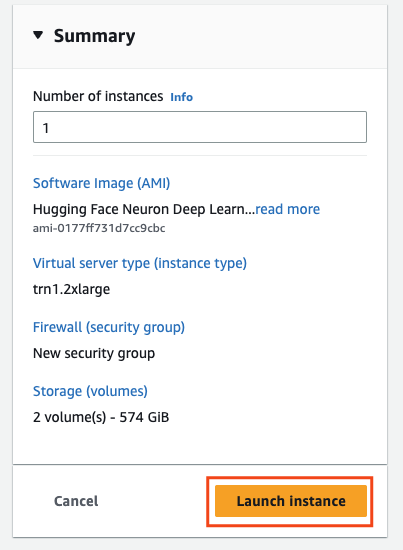
You are ready to launch the instance. Therefore click on “Launch Instance” on the right side.
AWS will now provision the instance using the Hugging Face Neuron Deep Learning AMI.
Connect through SSH
Once the instance is ready, you can view and copy the public IPv4 address to ssh into the machine.

Replace the empty strings "" in the snippet below with the IP address of your instances and the path to the key pair you created/selected when launching the instance.
PUBLIC_DNS="" # IP address
KEY_PATH="" # local path to key pair

ssh -i $KEY_PATH ubuntu@$PUBLIC_DNS
Once you are connected, you can run neuron-ls to ensure you have access to the Trainium accelerators. You should see a similar output than below.
ubuntu@ip-172-31-79-164:~$ neuron-ls
instance-type: trn1.2xlarge
instance-id: i-0570615e41700a481
+--------+--------+--------+---------+
| NEURON | NEURON | NEURON |   PCI   |
| DEVICE | CORES  | MEMORY |   BDF   |
+--------+--------+--------+---------+
| 0      | 2      | 32 GB  | 00:1e.0 |
+--------+--------+--------+---------+
How to set up your remote development environment
We will walk through setting up Jupyter Notebooks or VS Code remote server on the Amazon EC2 instance.
These two methods require an SSH connection of some kind. These instructions were written for a Mac, but should work on a Linux system as well. A PC may require using Putty.
You should have a .pem file that you created when you deployed your instance or had from previous deployments. You can connect to your system using:
ssh -i "/path/to/sshkey.pem" ubuntu@instance_ip_addressAccess through Jupyter Notebook
This method involves running the Jupyter notebook server on the Neuron instance, mapping a port locally, then using the browser on your desktop to access the notebook server.
Start by mapping a port on your local machine to the Neuron instance. From a terminal on your system, run
ssh -i "/path/to/sshkey.pem" -N -f -L localhost:8888:localhost:8888 ubuntu@instance_ip_addressThen connect to your Amazon EC2 instance using SSH from your computer. Once connected, from the command prompt, run
nohup jupyter notebook --no-browser --port=8888After a few seconds, check the nohup.out file to find your server’s token:
cat nohup.out | grep localhostCopy the connection string and paste it into your browser. After a few seconds, you should eventually see the Jupyter Notebook browser. It should look like http://localhost:8888/tree?token=337fc8de2aenot_a_real_tokene952c43946e4fb57131
This process works because you have mapped the 8888 port on your local machine to the 8888 port on the Neuron instance, so when you connect to localhost:8888, you end up accessing the Jupyter server on the Neuron instance.
If you have problems, make sure the initial port mapping was successful. If you already have something running on port 8888 on your machine, this may give you an error. You can always change the port (e.g. 8885) in all the instructions if you need to.
Access through VS Code remote server
With Visual Studio Code installed on your local machine, you can use the Remote-SSH command to edit and run files that are stored on a Neuron instance. See the VS Code article for additional details.
- Select Remote-SSH: Connect to Host… from the Command Palette (F1, ⇧⌘P)
- Enter in the full connection string from the ssh section above: ssh -i “/path/to/sshkey.pem” ubuntu@instance_ip_address
- VS Code should connect and automatically set up the VS Code server.
- Eventually, you should be prompted for a base directory. You can browse to a directory on the Neuron instance.
- In case you find that some commands seem greyed out in the menus, but the keyboard commands still work (⌘S to save or ^⇧` for terminal), you may need to restart VS Code.